
This post may contain affiliate links. Read my disclosure policy.
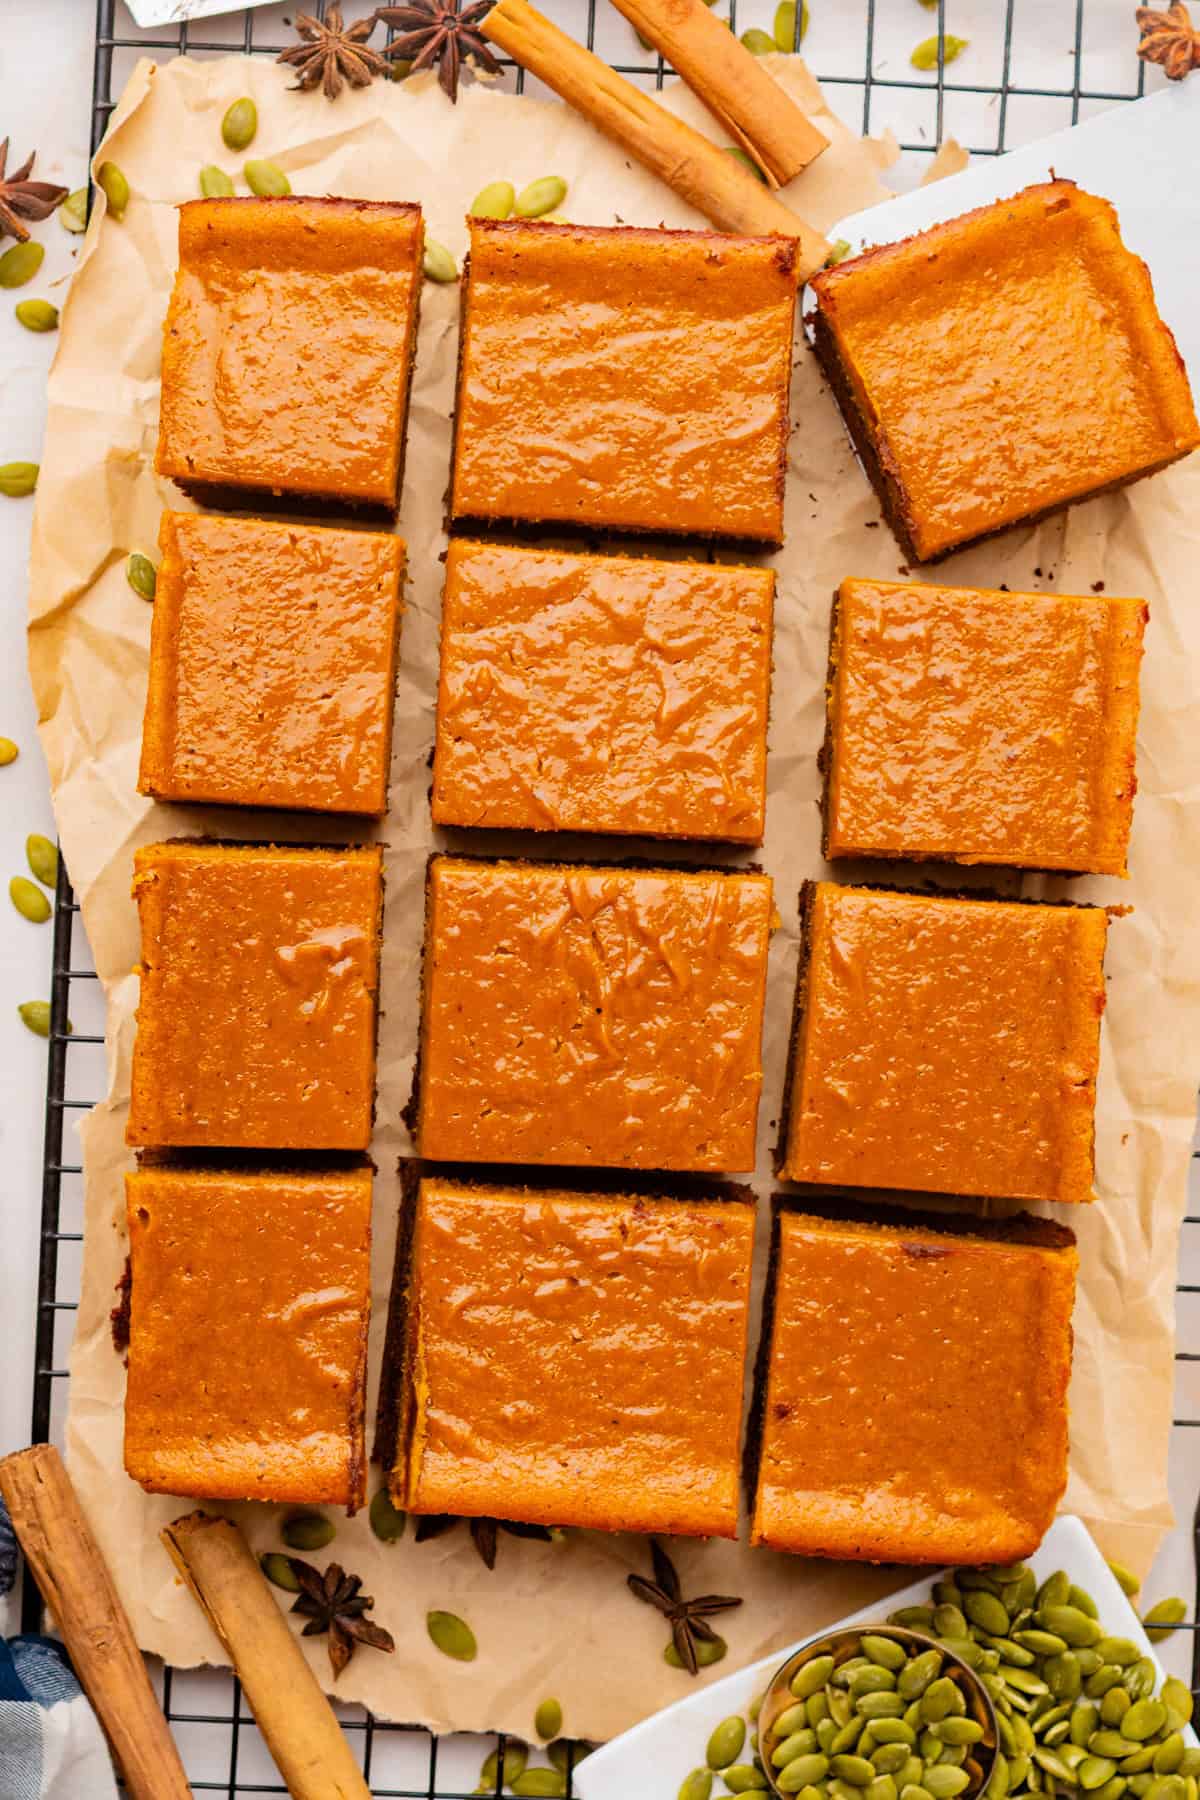
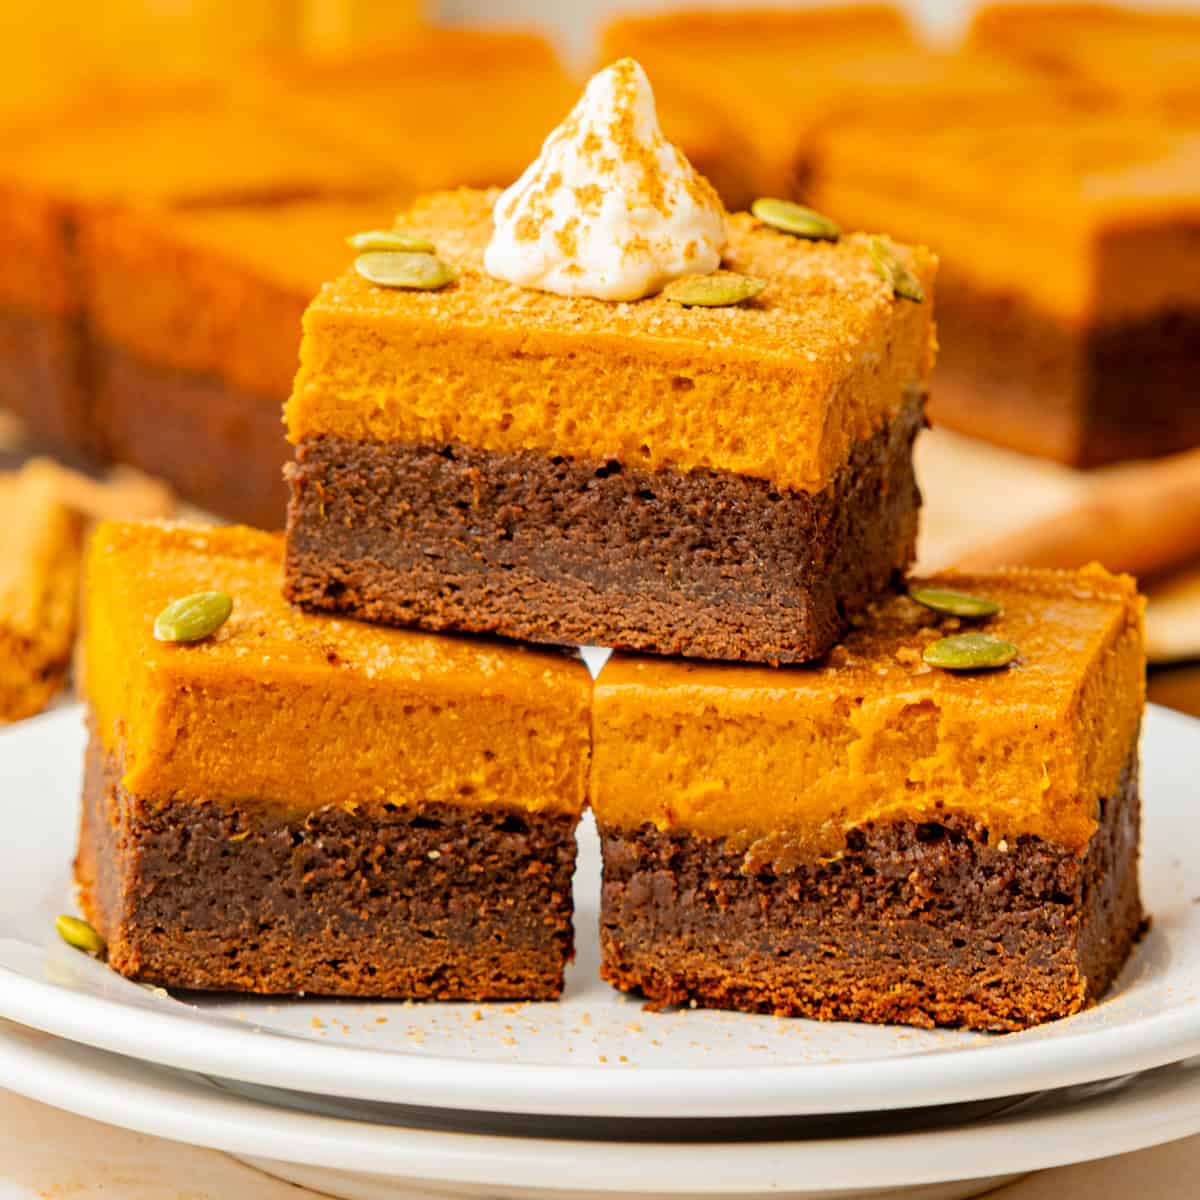
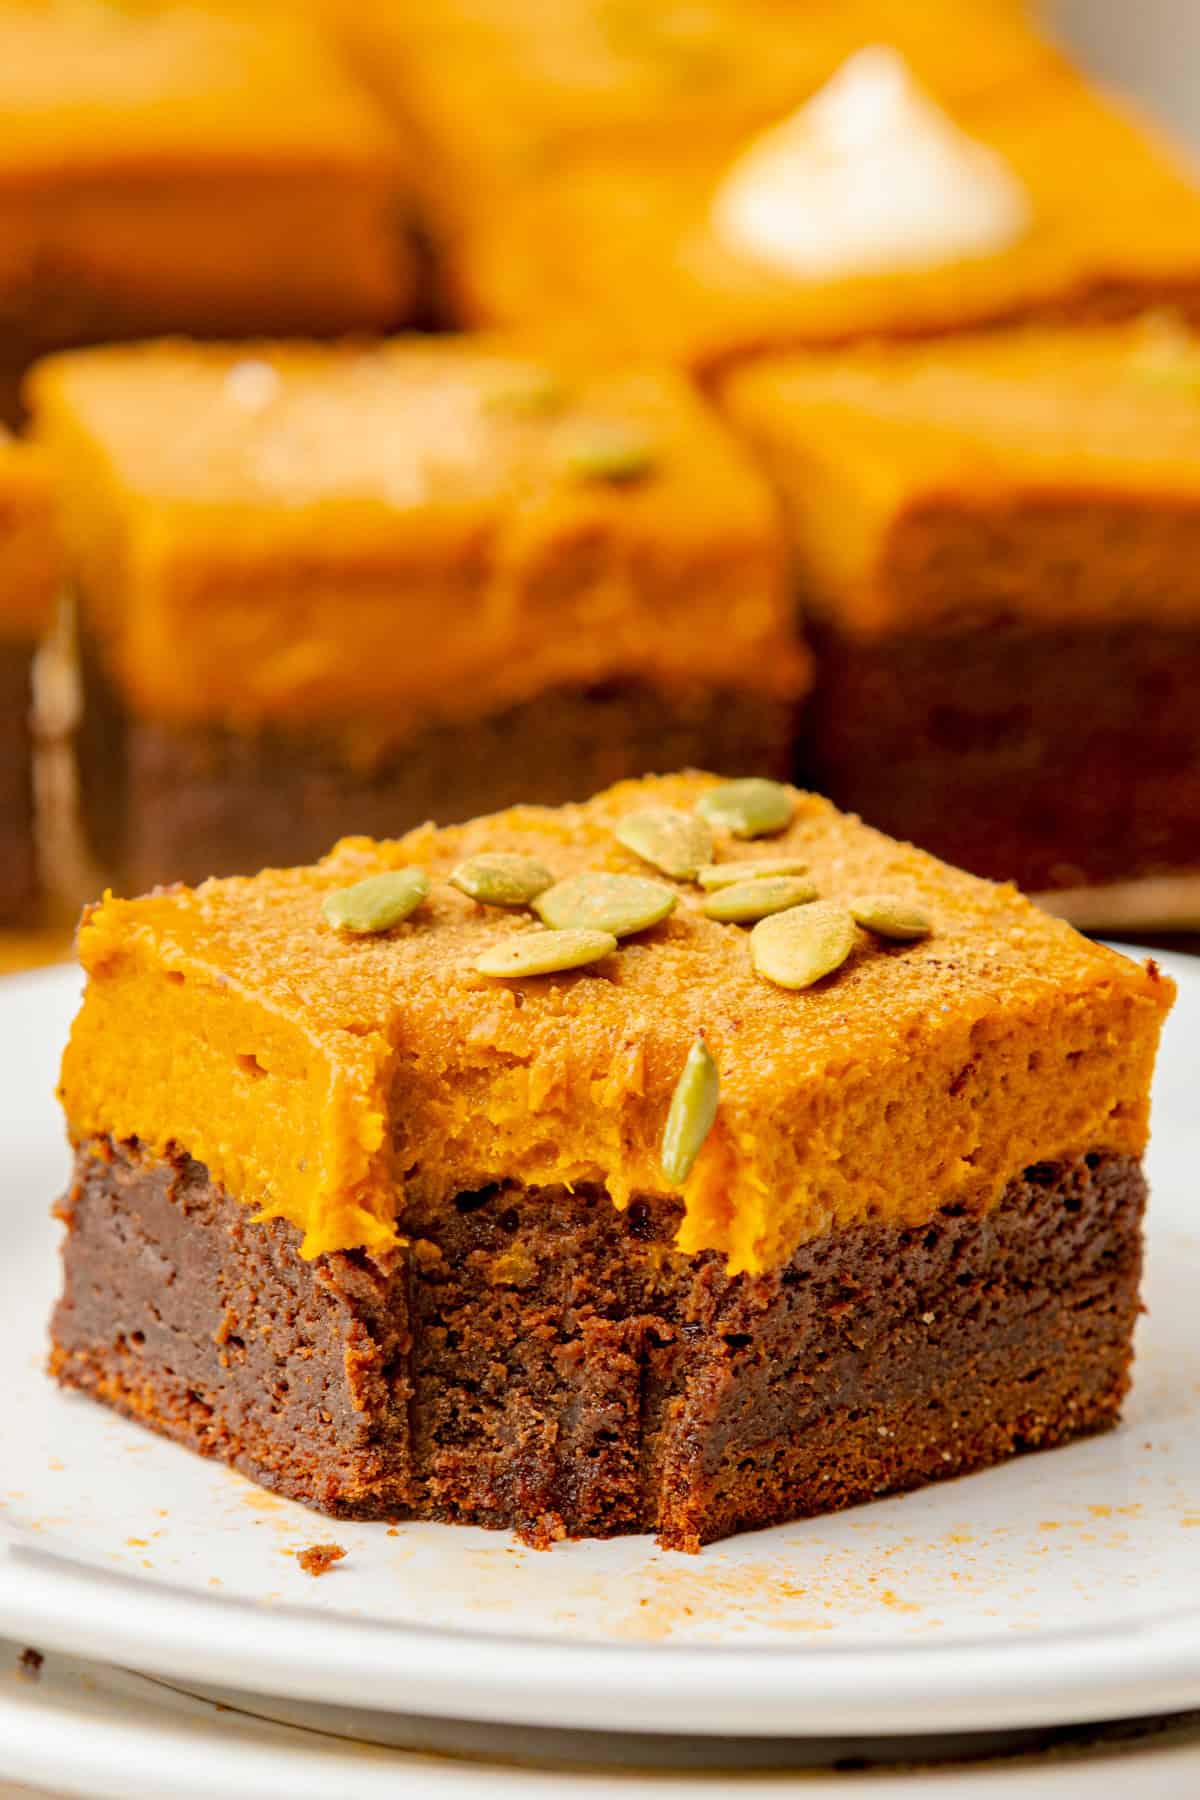
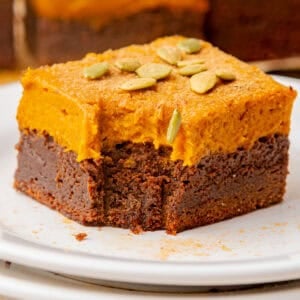
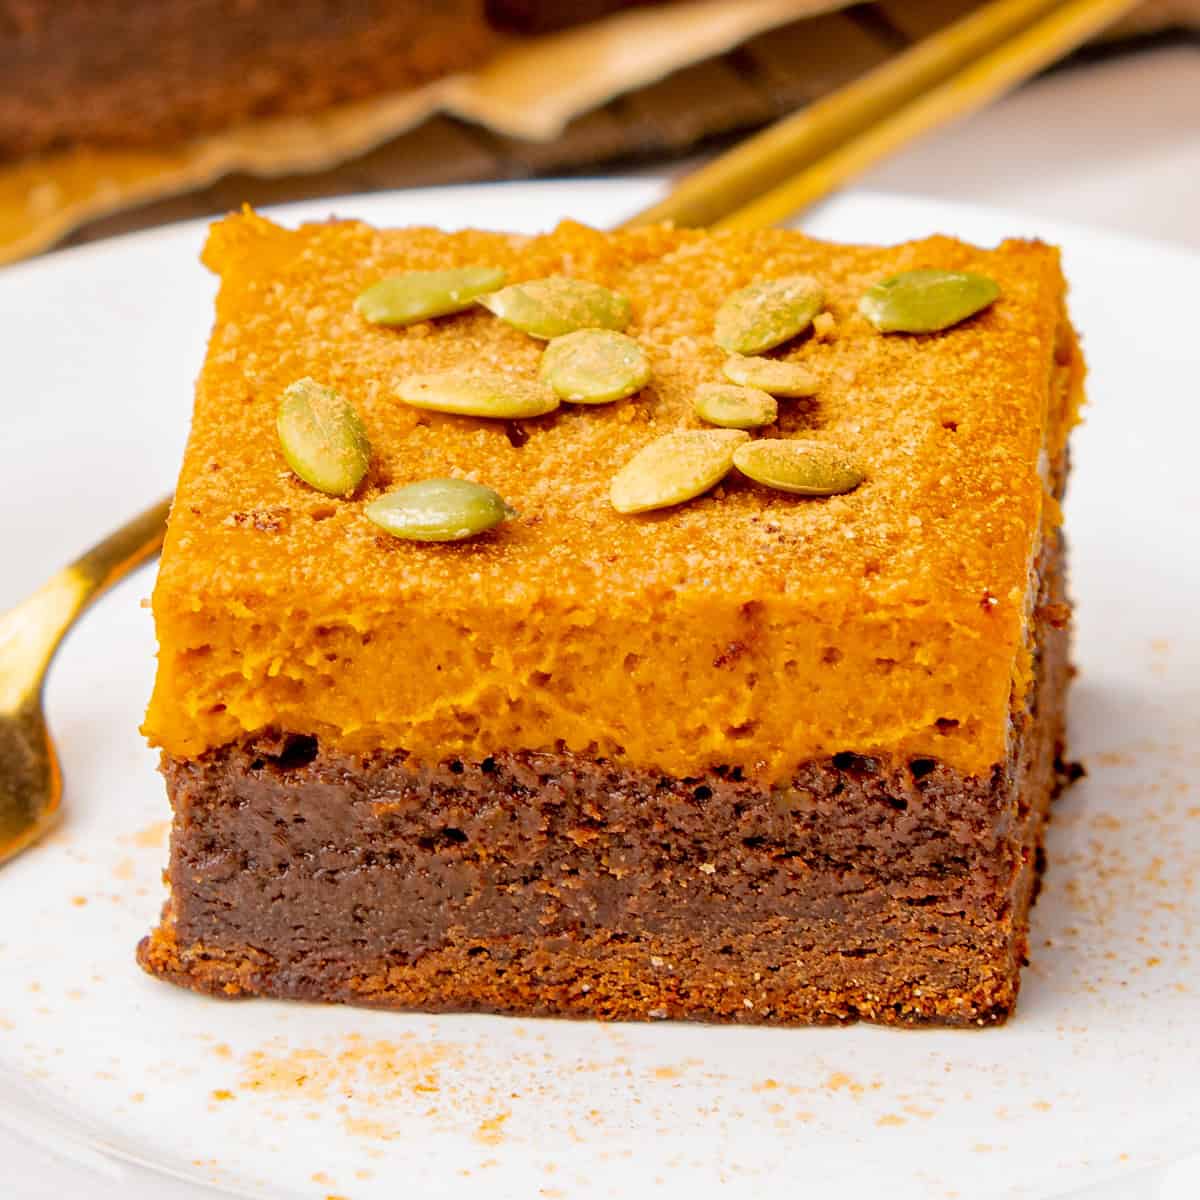
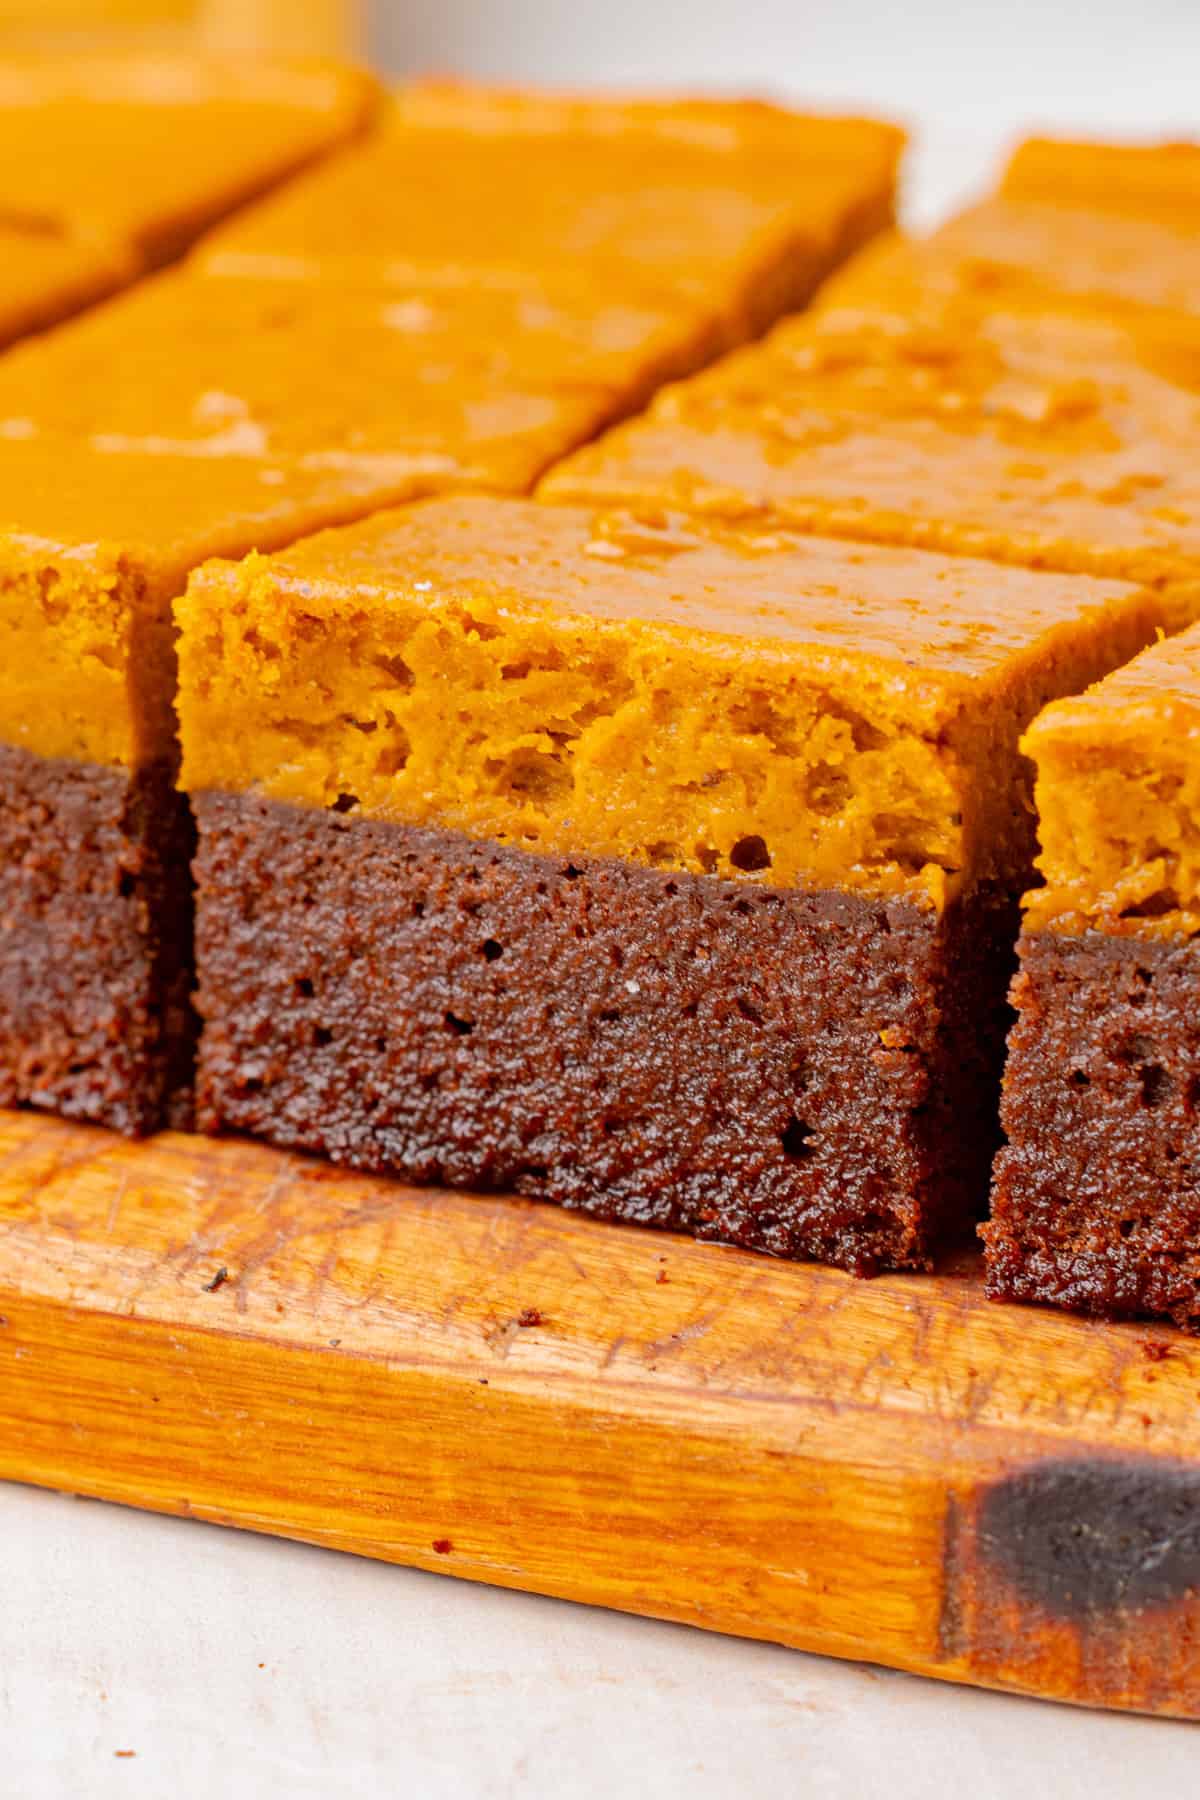
My pumpkin pie brownies are two desserts stacked into one pan. The bottom is a dense, fudgy brownie made with melted chocolate and no leavening. The top is a thick, custardy pumpkin pie layer spiced with cinnamon, ginger, nutmeg, and cloves. I bake them in 2 stages in an 8x8-inch pan, chill overnight, and slice into clean squares with defined layers. This make-ahead fall dessert is perfect for Halloween, Friendsgiving, and Thanksgiving.
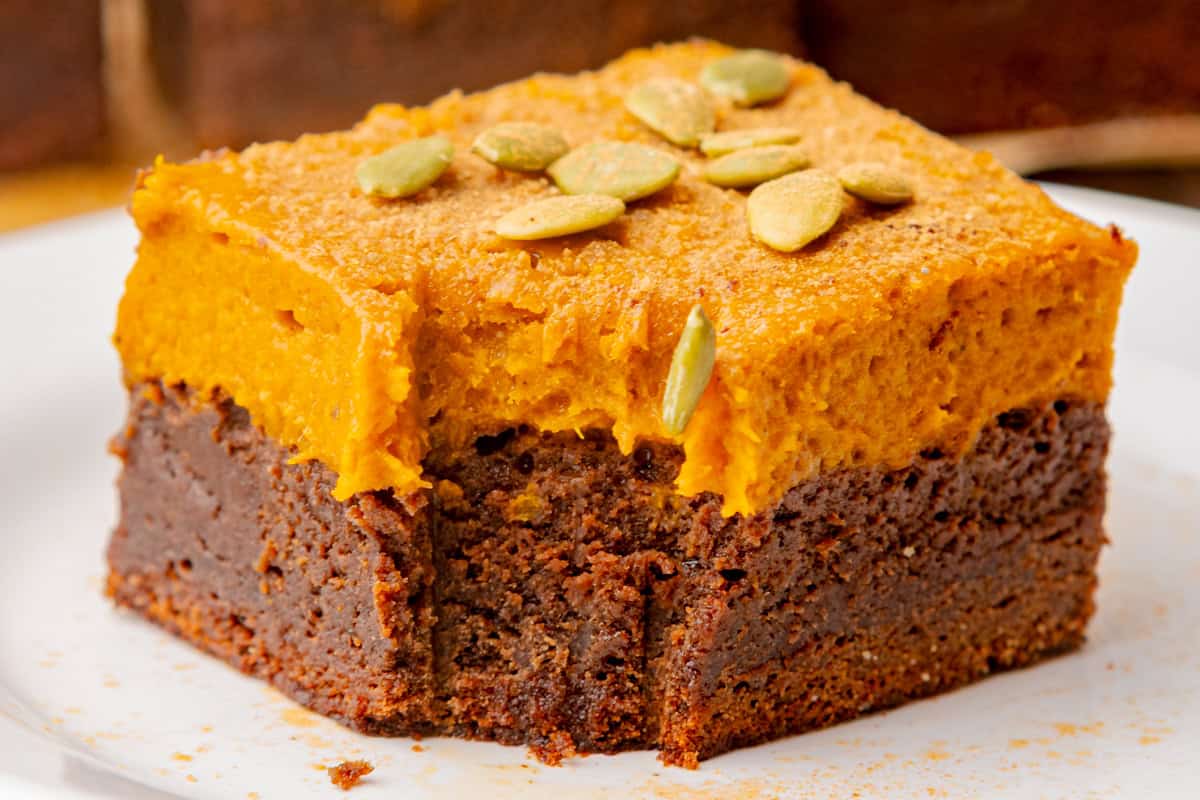
Fall-Inspired Pumpkin Brownies
Most pumpkin brownie recipes swirl a spoonful of pumpkin batter into chocolate. I wanted the opposite. I wanted a real pumpkin pie layer, thick enough to taste like pie, sitting on a proper brownie.
The trade-off is that a thick pumpkin layer needs time in the oven, and a finished brownie would dry out while it waits. So my solution is to bake the brownie partway, pour the pumpkin filling over it while it's still warm, then finish both together at a lower temperature. It took a few tries to get the timing right, and I'm happy with where it landed.
If you like this style of layered brownie bars, you'll also like my mint chocolate brownies and my s'mores brownies, both of which use the same "two textures in one pan" idea.
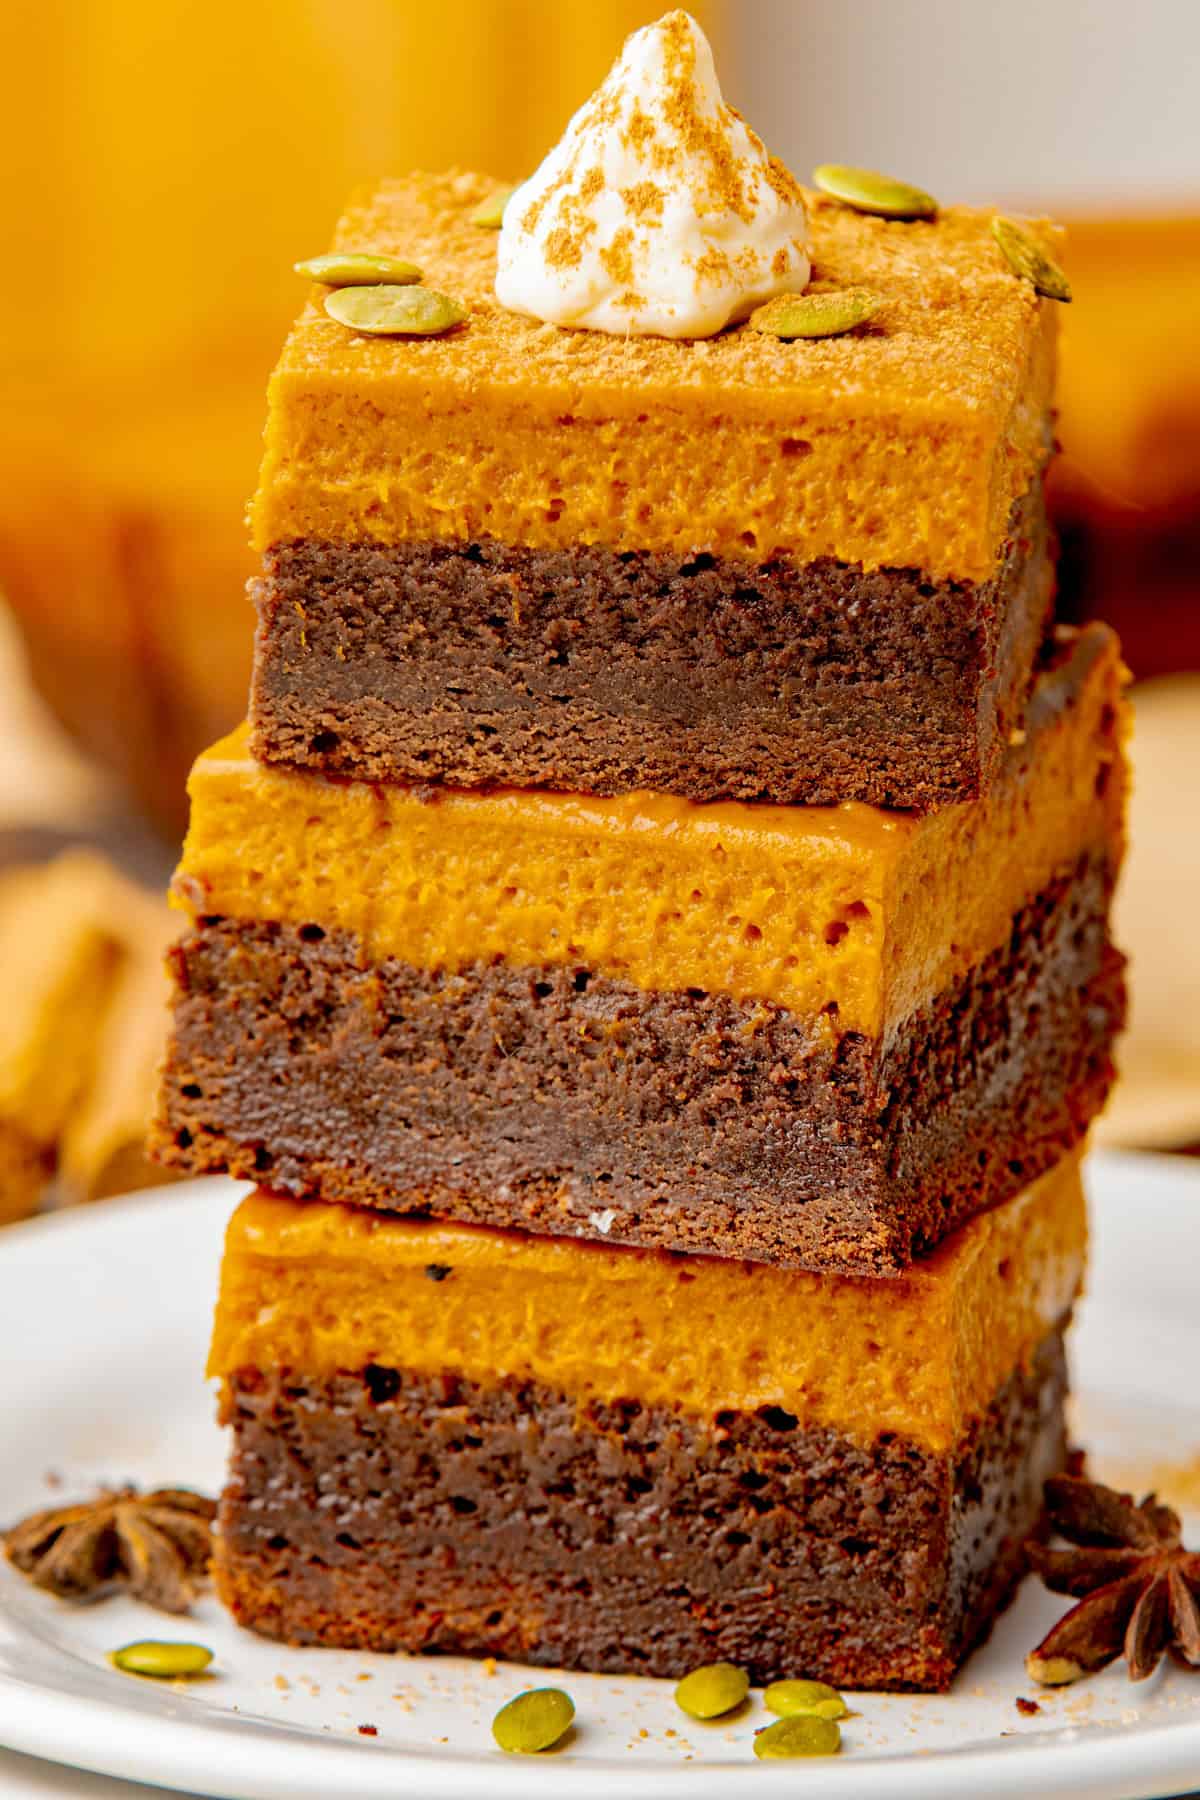
Why You'll Love These Pumpkin Brownies
- Two classic fall desserts in one 8x8 pan
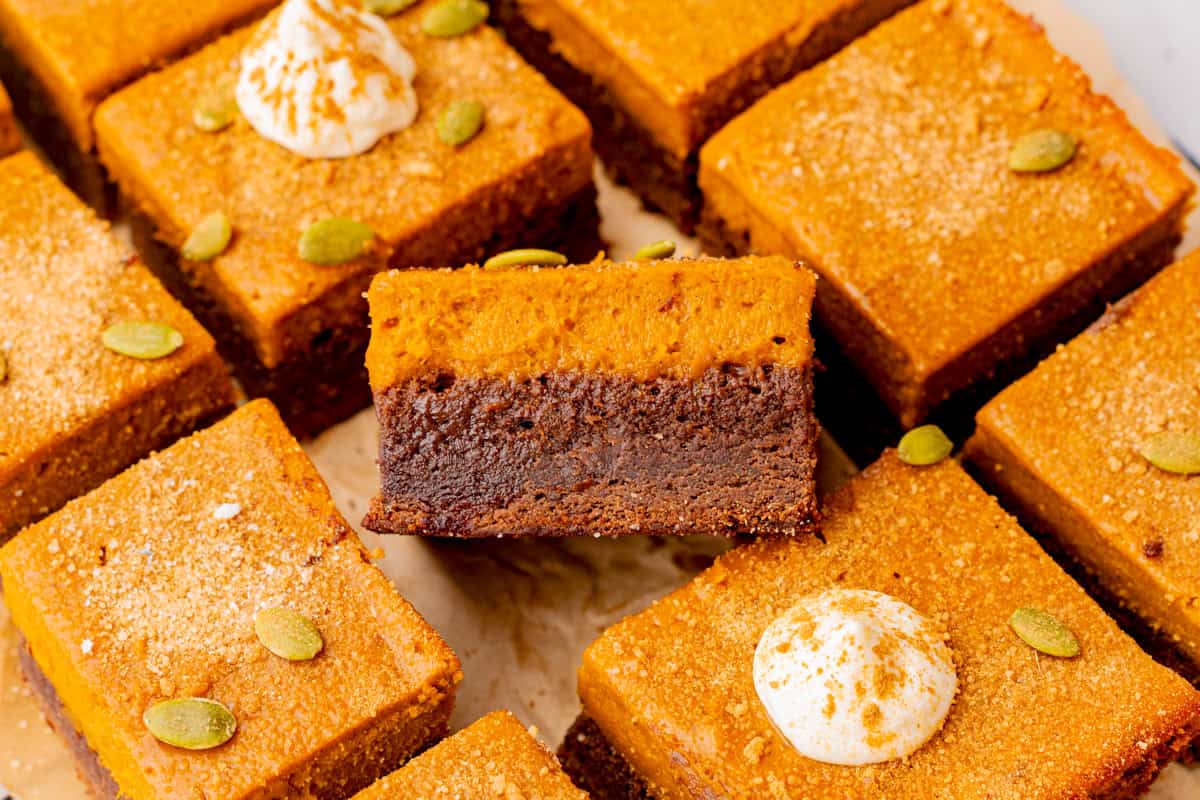
- Beautiful presentation: thick pumpkin pie layer (not a thin swirl) sits on top of the dense, fudgy brownie base.
- Made almost entirely with pantry staples and one can of pumpkin puree
- Better on day two, so you can make them a full day ahead
- Slices into clean, photo-ready squares once chilled
- Perfect for Halloween, Friendsgiving, Thanksgiving, and Christmas!
Ingredients You Need
Here's what goes into each layer and why. The recipe card below has the full amounts, with gram weights alongside if you prefer to bake by scale. I encourage you to read my ingredient notes below before making this recipe.
1) For the fudgy brownie layer
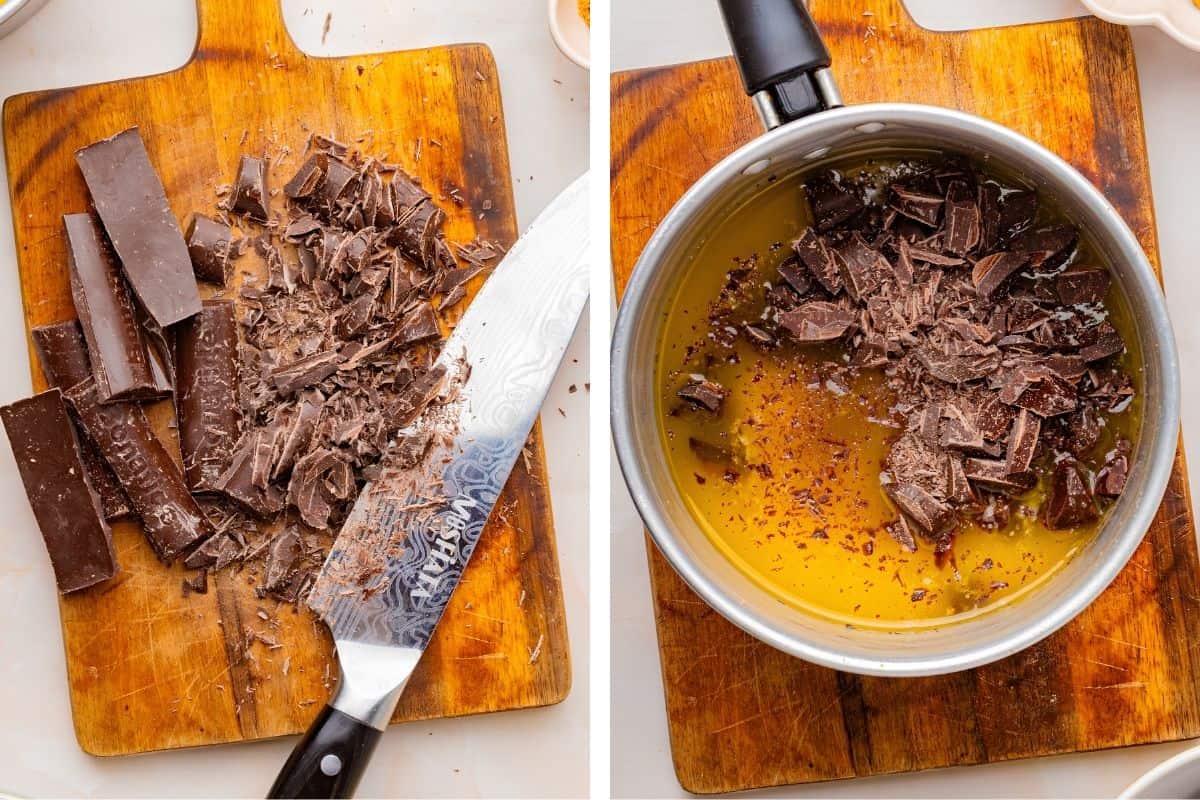
- Semi-sweet chocolate (1½ cups chopped), 55 to 65% cacao: Chop a bar by hand instead of using chips. Chips contain stabilizers that keep them from melting smoothly. Ghirardelli and Guittard both work well here.
- Unsalted butter (¾ cup + 1 tablespoon), melted: Melted butter plus a low flour amount is what makes a brownie fudgy instead of cakey.
- Granulated sugar (1 cup): Sweetens and helps form that thin, papery top.
- Eggs (3 large) plus 1 egg yolk: Room temperature. Cold eggs can seize warm chocolate. The extra yolk adds richness and helps the base hold together under all that pumpkin.
- Vanilla extract (1 teaspoon): Pure, not imitation.
- All-purpose flour (⅔ cup): Just enough for structure. More would push these toward cake.
- Unsweetened cocoa powder (¼ cup): Deepens the chocolate flavor alongside the melted chocolate. Dutch-process or natural both work.
- Fine salt (¼ teaspoon): Small amount, big difference. Don't skip it.
- No baking powder or baking soda. I want a dense, flat base that can carry the weight of the pumpkin layer without doming.
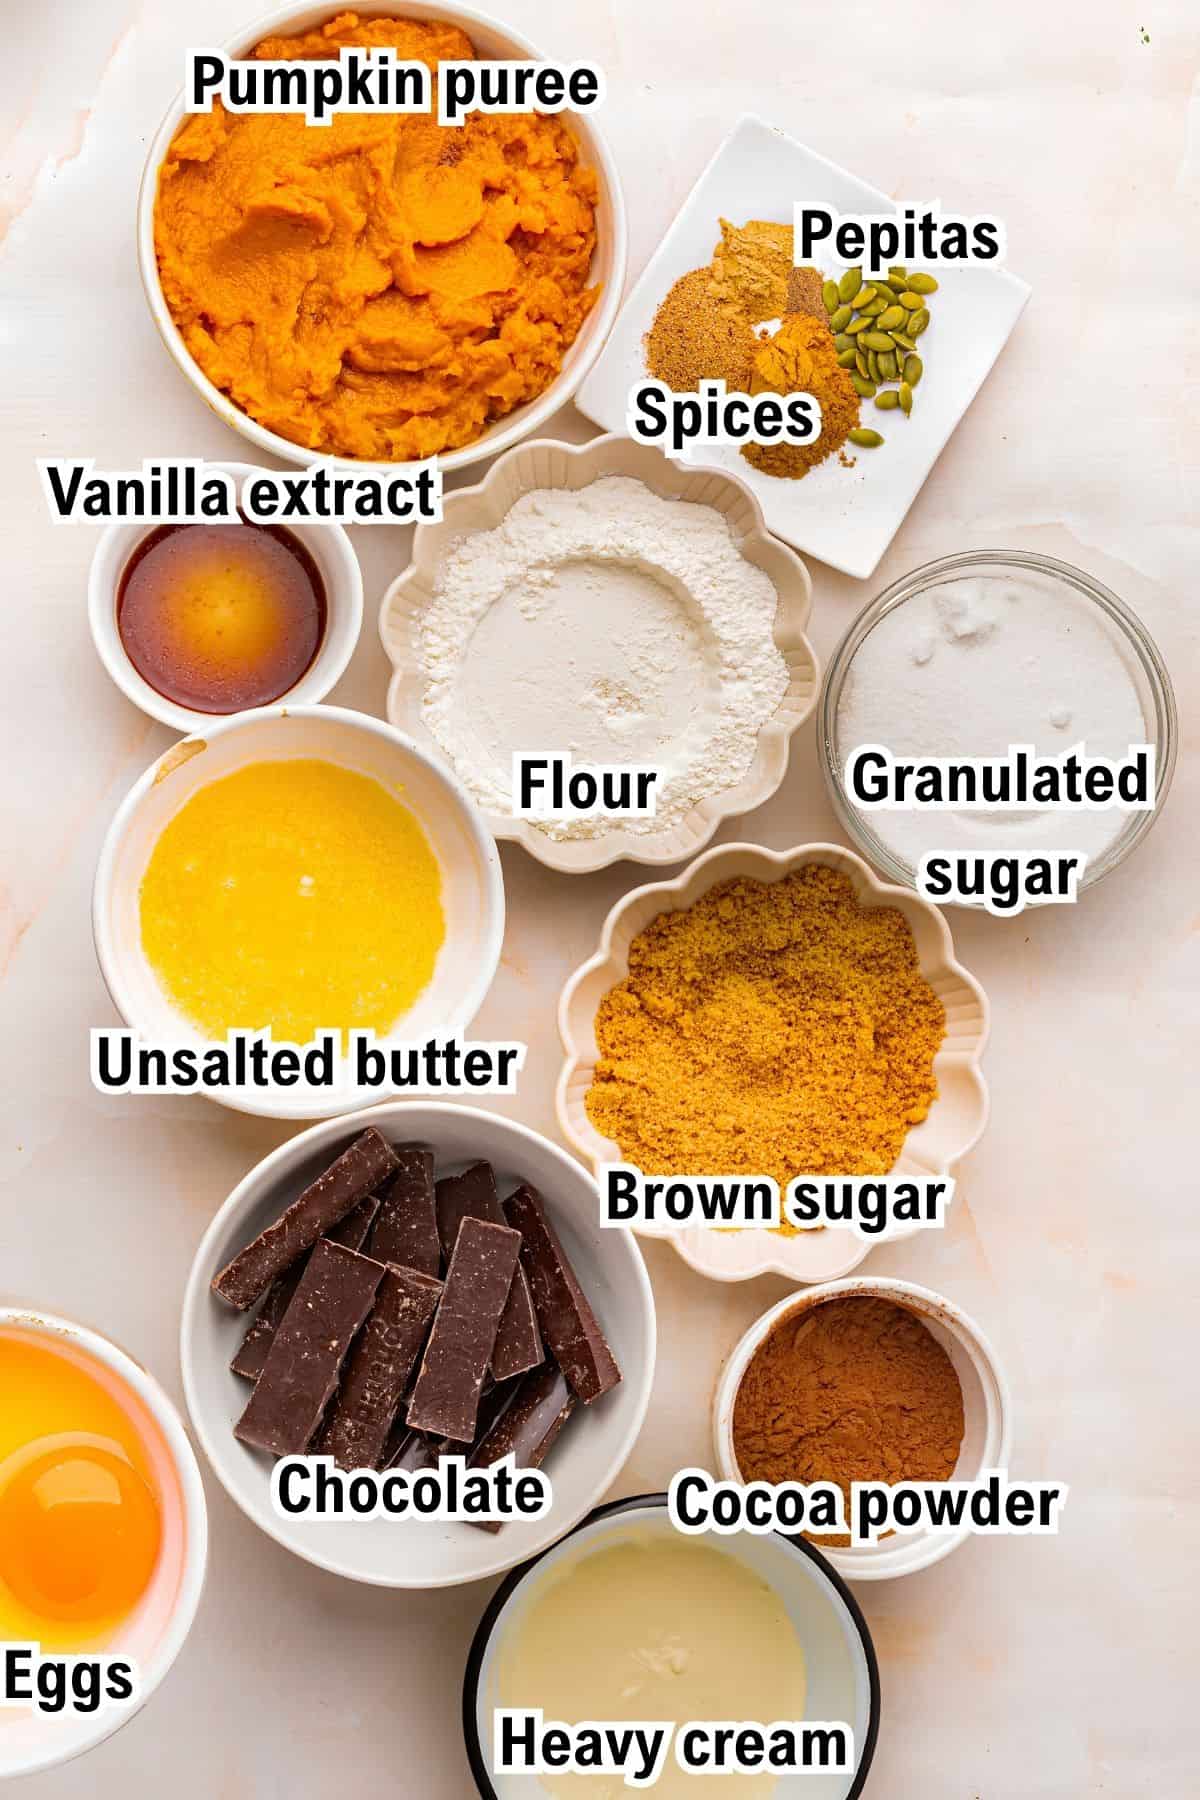
2) For the pumpkin pie layer
- Pumpkin puree (1¾ cups, or one 15 oz can): Use 100% pumpkin puree, never pumpkin pie filling. Pie filling is already sweetened and spiced and will throw the whole recipe off. If your brand looks watery, drain it in a fine-mesh strainer for a few minutes before measuring. This matters more here than in a regular pumpkin cake because the layer is so deep.
- Eggs (2 large) plus 1 egg yolk: Room temperature. These are what set the custard.
- Heavy cream (½ cup): Gives the layer its silky texture.
- Light brown sugar (½ cup, packed) and granulated sugar (¼ cup): Two sugars. Brown sugar adds caramel flavor and moisture; granulated sugar adds clean sweetness.
- All-purpose flour (2 tablespoons): A small amount of flour stabilizes a custard this thick and helps it slice cleanly. Cornstarch works as a substitute in the same amount.
- Cinnamon (1¼ teaspoons), ginger (½ teaspoon), nutmeg (¼ teaspoon), cloves (¼ teaspoon): My cinnamon-forward blend. You can use 2 teaspoons of store-bought pumpkin pie spice instead.
- Fine salt (½ teaspoon) and vanilla extract (1 teaspoon): Salt keeps the pumpkin layer from tasting flat.
3) For decorating (optional)
- Cinnamon sugar (2 tablespoons) and toasted pepitas (¼ cup): Add these after chilling, right before serving, so the sugar stays crisp. I toast raw pepitas in a dry skillet for 3 to 4 minutes first, which makes a real difference.
- Whipped cream and a dusting of ground cinnamon: Add at the table, per square.
My Recipe Testing Tips
- The underbaked brownie is correct. The first time you lift the pan at 16 minutes (right before adding the pumpkin layer), the soft center will worry you. It's supposed to look that way. It has another 40 minutes of baking coming. The first bake is only there to create enough structure to hold the filling.
- Cool the chocolate before adding the eggs. It should be warm and pourable, not hot. Slowly pour it into the eggs while whisking. Pouring hot chocolate too fast will scramble them.
- Stop mixing as soon as the flour disappears. Overmixing develops gluten, and gluten makes a tough brownie.
- Do not size up the pan. The 8x8 is the correct pan size. If you use a 9x13, it spreads the same amount of filling into a thin layer, and you lose the height.
- Can I use a 9x9-inch pan? Yes, with a slightly shorter second bake. Start checking at 32 minutes. Your layers will be a little shorter.
- Use a pan at least 2 inches deep. This recipe fills the pan close to the rim.
- You will bake at two temperatures; pay attention to baking times! 350°F (175°C) for the brownie, then 325°F (165°C) for the pumpkin. The lower second temperature lets a thick custard cook through without drying the edges or the brownie underneath.
- Watch the jiggle, not the timer. The pumpkin layer is done when the edges are set, the surface looks matte instead of wet, and the center moves as one small, cohesive wobble when you shake the pan. Liquid rippling means it needs more time. A completely rigid, cracked surface means the pumpkin brownies are overbaked (although still delicious!).
- Don't judge the texture while they're warm. Warm pumpkin filling feels loose and can make you think the recipe failed. It hasn't. It firms up considerably in the refrigerator.
- Cool at room temperature first, then chill. Putting it straight from the oven into the refrigerator creates condensation on the surface. Let the brownies sit on the counter for an hour.
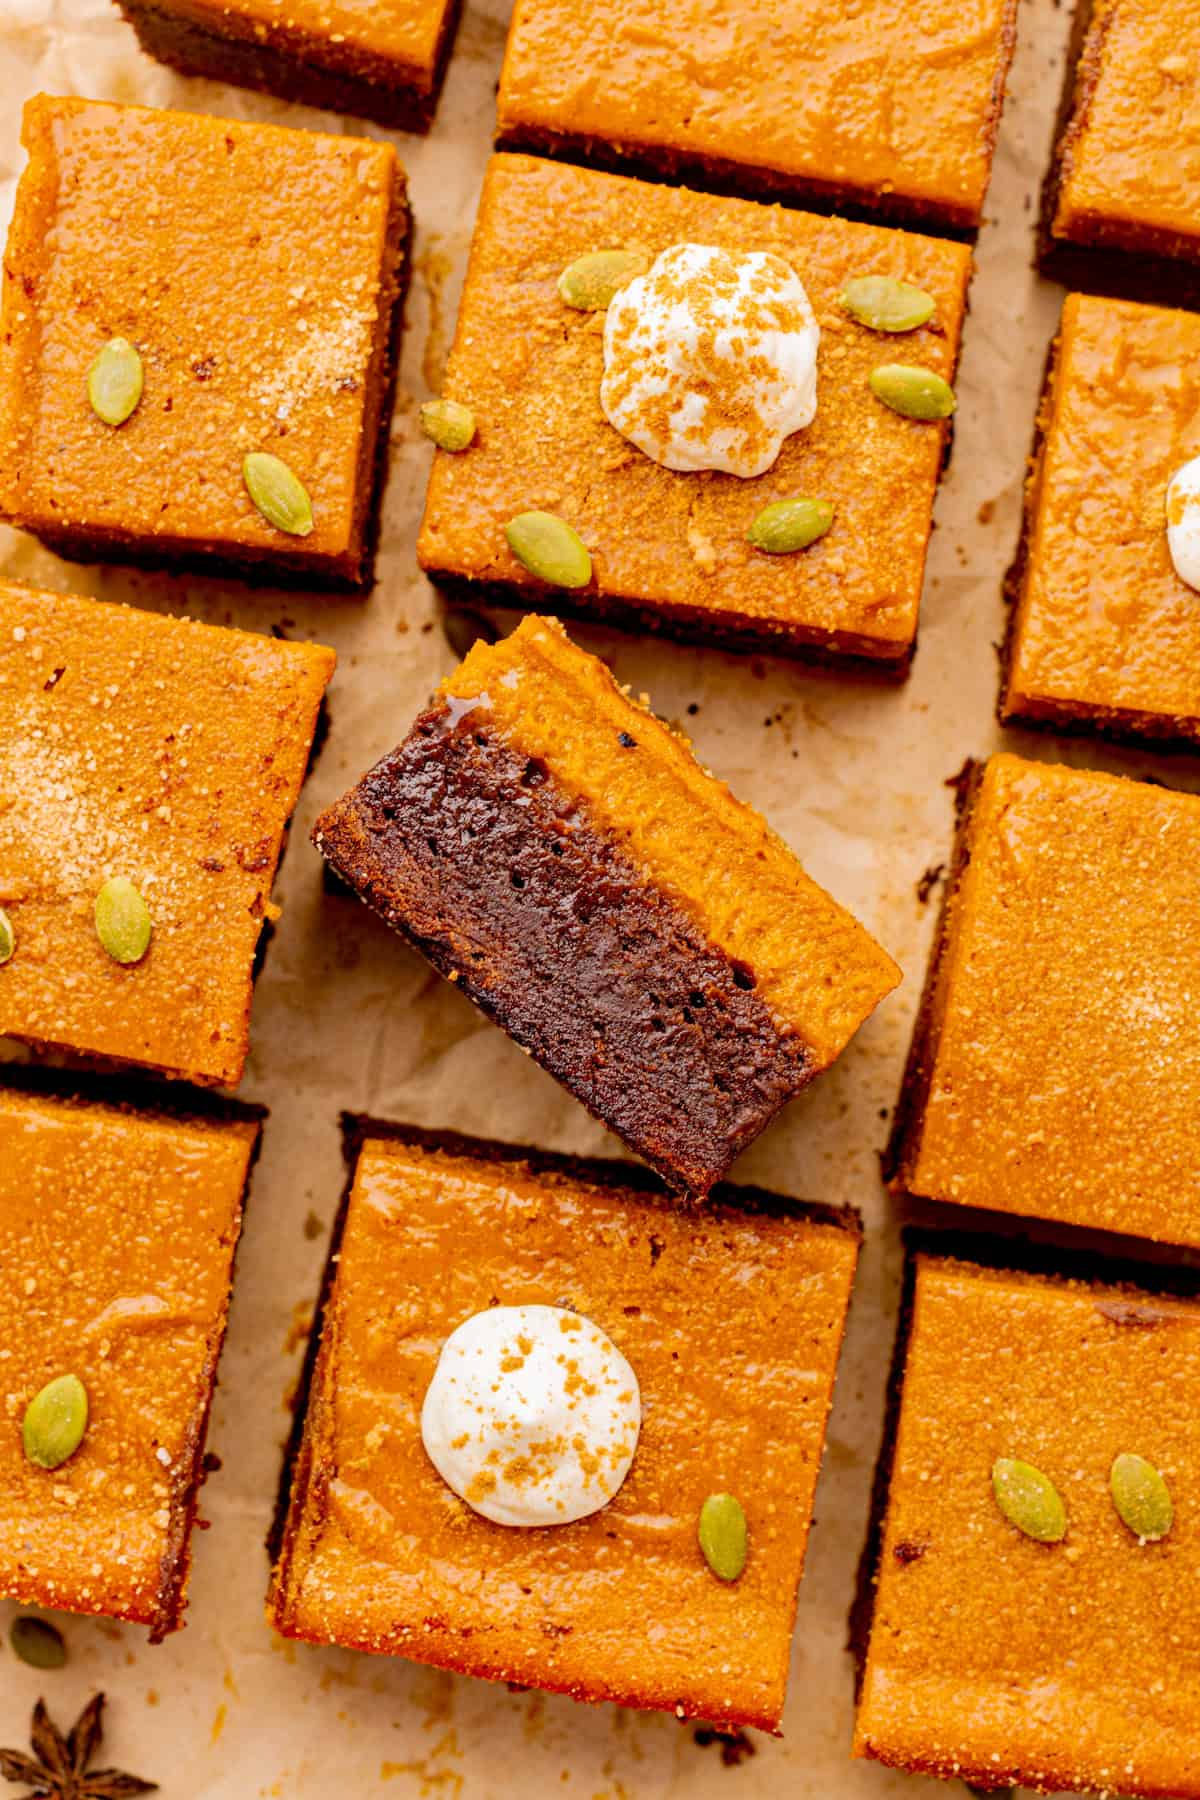
- Wipe the knife between cuts. Run a sharp knife under hot water, dry it, press straight down without sawing, then wipe the blade. That's how you get clean layer lines.
FAQs
- Can I use pumpkin pie filling instead of puree? No. Pie filling comes pre-sweetened and pre-spiced, and it will throw off both the sugar and the set. Use a can that lists pumpkin as the only ingredient.
- My pumpkin layer cracked. What happened? It baked too long. Cracks and a completely rigid center mean the custard overset. Pull the pan when the middle still gives a slight wobble.
- Why is my brownie layer so soft? It's meant to be fudgy, and it firms up considerably during the chill. If it's still loose after a full overnight in the fridge, you probably underbaked it.
- Can I make these ahead? Yes, and I recommend it. They are better on day two. Make them a full day before you need them and chill overnight.
- Can I freeze them? Yes, up to 1 month. Wrap the chilled, uncut slab in two layers of plastic wrap plus foil, or freeze individual squares with parchment between them. Thaw overnight in the fridge.
- Do these need to stay refrigerated? They do. The pumpkin layer contains eggs and heavy cream, so keep them in the fridge, not on the counter.
- Can I make them gluten-free? Yes. Both layers use small amounts of flour, and a 1:1 gluten-free baking flour works well in each.
- Can I double the recipe? Use a 9x13 pan and double everything. The layers will sit slightly lower, so start checking for doneness around 40 minutes.
I hope you try these pumpkin pie brownies this fall! Let me know in the comments how yours turned out, or if you have any questions about the two-bake method. I'm always happy to help. ❤️ Julia.
Pumpkin Brownies (Thick Pumpkin Pie Layer Over a Fudgy Brownie Base)
Equipment
- 8 x 8-inch Square Pan (20 x 20 cm) at least 2 inches deep
Ingredients
Fudgy brownie layer
- 1½ cups semi-sweet chocolate (8.5 oz / 240 g), 55 to 65% cacao, finely chopped
- ¾ cup unsalted butter (1 stick + 5 tablespoons / 180 g), melted
- 1 cup granulated sugar (200 g)
- 3 large eggs (150 g), room temperature
- 1 large egg yolk (18 g), room temperature
- 1 teaspoon vanilla extract
- ⅔ cup all-purpose flour (80 g)
- ¼ cup unsweetened cocoa powder (20 g)
- ¼ teaspoon fine salt (1 g)
Pumpkin pie layer
- 1¾ cups pumpkin puree (one 15 oz can / 425 g), not pumpkin pie filling
- 2 large eggs (100 g), room temperature
- 1 large egg yolk (18 g), room temperature
- ½ cup heavy cream (120 g)
- ½ cup light brown sugar (100 g), packed
- ¼ cup granulated sugar (50 g)
- 2 tablespoons all-purpose flour (16 g)
- 1¼ teaspoons ground cinnamon (3 g)
- ½ teaspoon ground ginger (1 g)
- ¼ teaspoon ground nutmeg (0.5 g)
- ¼ teaspoon ground cloves (0.5 g)
- ½ teaspoon fine salt (3 g)
- 1 teaspoon vanilla extract
For decorating (optional)
- 2 tablespoons cinnamon sugar (20 g)
- ¼ cup pepitas (30 g), raw and unsalted, toasted
- Whipped cream for serving
- Ground cinnamon for dusting
Instructions
- Preheat the oven to 350°F (175°C). Line an 8x8-inch (20x20 cm) square pan with parchment paper, leaving enough overhang on two sides to lift the brownies out later. Lightly grease the sides of the pan.
- Melt the chocolate and butter. Place the chopped chocolate and melted butter in a heatproof bowl. Set it over barely simmering water, or microwave in 15 to 20 second intervals, stirring well between each. Stir until completely smooth and glossy, then set aside to cool. The mixture should stay warm and fluid, but not hot.
- In a large bowl, whisk the eggs, egg yolk, granulated sugar, and vanilla for 1 to 2 minutes, just until smooth and slightly thickened. Do not whip the mixture until airy.
- Slowly pour the warm chocolate mixture into the egg mixture while whisking gently. Continue until completely smooth.
- Sift the flour, cocoa powder, and salt into the same bowl. Fold gently with a spatula just until no dry flour remains. Do not overmix.
- First bake. Transfer the batter to the prepared pan and spread it evenly into the corners. Bake at 350°F (175°C) for 15 to 18 minutes. The edges should be set, a thin skin should be forming on top, and the center should still be very soft. It should not look like a finished brownie.
- Make the pumpkin layer while the brownie bakes. In a large bowl, whisk together the pumpkin puree, eggs, egg yolk, heavy cream, brown sugar, granulated sugar, and vanilla. Whisk in the flour, cinnamon, ginger, nutmeg, cloves, and salt until completely smooth.
- As soon as the brownie comes out of the oven, carefully pour the pumpkin mixture over the hot brownie. Spread it into an even layer with a spatula. Do not press down, since the brownie underneath is still delicate.
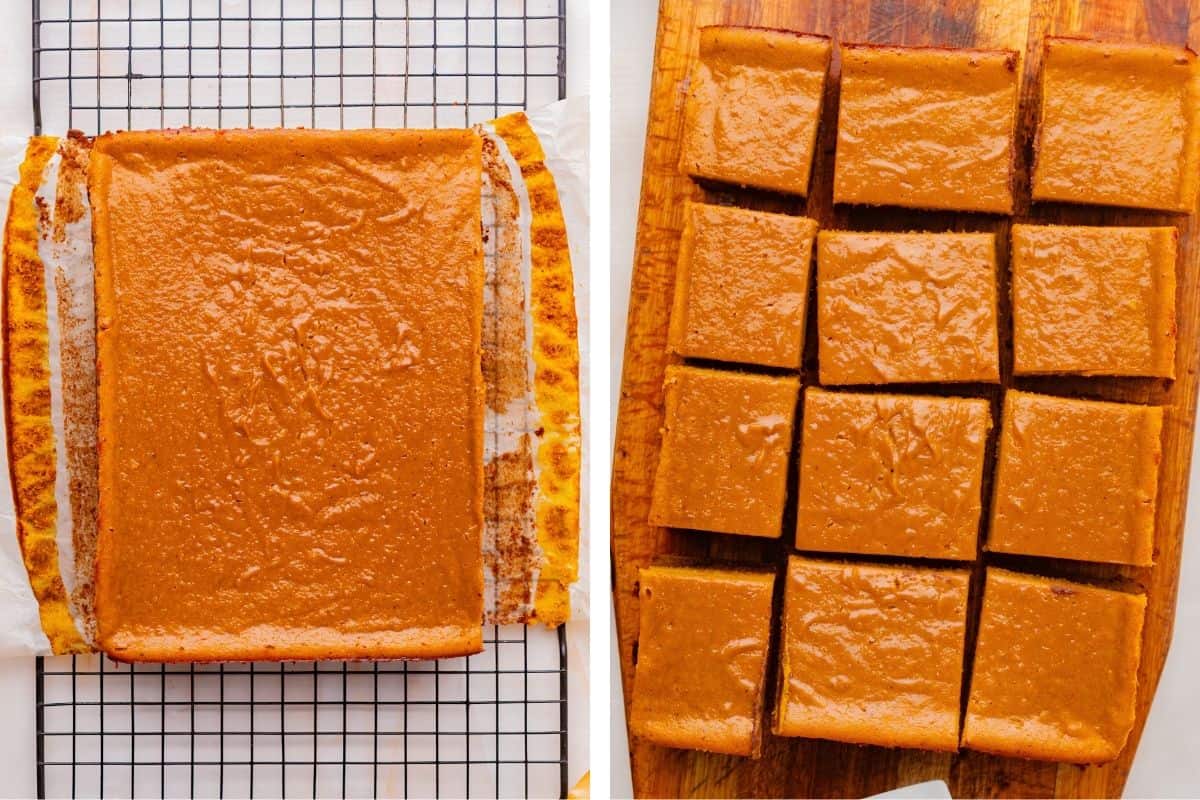
- Second bake. Reduce the oven temperature to 325°F (165°C) and return the pan to the oven. Bake for 35 to 50 minutes, starting to check at 35 minutes. The pumpkin layer is ready when the edges are set, the surface looks matte rather than wet, and the center gives one small, cohesive jiggle when you gently shake the pan. A liquid ripple means it needs more time. A rigid, cracking surface means it went too far.
- Cool for 1 hour: Place the pan on a wire rack and cool completely at room temperature for about 1 hour. Do not refrigerate while warm, since gradual cooling helps the pumpkin layer set and reduces condensation.
- Chill thoroughly in the fridge. Cover the pan and refrigerate for at least 4 hours, preferably overnight. The pumpkin layer is much softer straight out of the oven, and this is what gives you clean, defined layers. Do not judge the texture while the brownies are warm.
- How to slice pumpkin brownies properly. Lift the chilled slab out of the pan using the parchment overhang. Cut into 12 squares with a sharp knife, wiping the blade with a damp paper towel between cuts. Sprinkle with cinnamon sugar and toasted pepitas, and serve with whipped cream and a dusting of cinnamon if you like.
Notes
- Pumpkin puree: Use 100% pumpkin puree, not pumpkin pie filling. Pie filling is already sweetened and spiced. If your puree looks watery, drain it in a fine-mesh strainer for a few minutes before weighing.
- Chocolate: Chop a bar rather than using chips. Chips contain stabilizers that resist smooth melting.
- No leavening: There is no baking powder or baking soda in the brownie layer. A dense base is what supports the thick pumpkin layer.
- Use an 8x8 inch square pan: Do not use a larger pan. The 8x8 gives the height that makes the pumpkin layer thick. Make sure your pan is at least 2 inches deep.
- You can use a 9x13 inch pan: Double every ingredient and start checking the second bake around 40 minutes. Chill at least 5 hours.
- Spice swap: Use about 2 teaspoons (5 g) of pumpkin pie spice in place of the cinnamon, ginger, nutmeg, and cloves.
- Gluten-free version: A 1:1 gluten-free baking flour works in both layers.
- Special tools: 8x8-inch baking pan, parchment paper, heatproof bowl, whisk, rubber spatula, fine-mesh strainer.
- I provide helpful step-by-step photos below this recipe card as a visual guide. They are especially helpful for seeing the doneness levels.
Storage
- Fridge: Store pumpkin brownies in an airtight container for up to 4 days, with parchment between stacked layers. Because the pumpkin layer contains eggs and heavy cream, these must stay refrigerated.
- Freezer: Freeze up to 1 month. Wrap the chilled uncut slab in two layers of plastic wrap plus heavy-duty foil, or freeze individual squares in an airtight container with parchment between them. Thaw overnight in the fridge.
- Serving: For the best texture, let a square sit at room temperature for 10 to 15 minutes before serving.
Nutrition
Nutrition Disclaimer:
The nutritional information on this website is only an estimate and is provided for convenience and as a courtesy only. The accuracy of the nutritional information for any recipe on this site is not guaranteed. It should not be used as a substitute for a professional nutritionist's advice.
How to Make Pumpkin Brownies (Step-by-Step)
The full recipe, with amounts and complete directions, is in the recipe card above. Here is the short version so you know what to expect + helpful process shots.
- Prepare the pan. Heat the oven to 350°F (175°C). Line an 8 x 8-inch (20 x 20 cm) pan with parchment, leaving overhang on two sides so you can lift the brownies out later.
- Melt the chocolate and butter together until smooth and glossy, then let the mixture cool slightly. It should be warm and pourable, never hot.
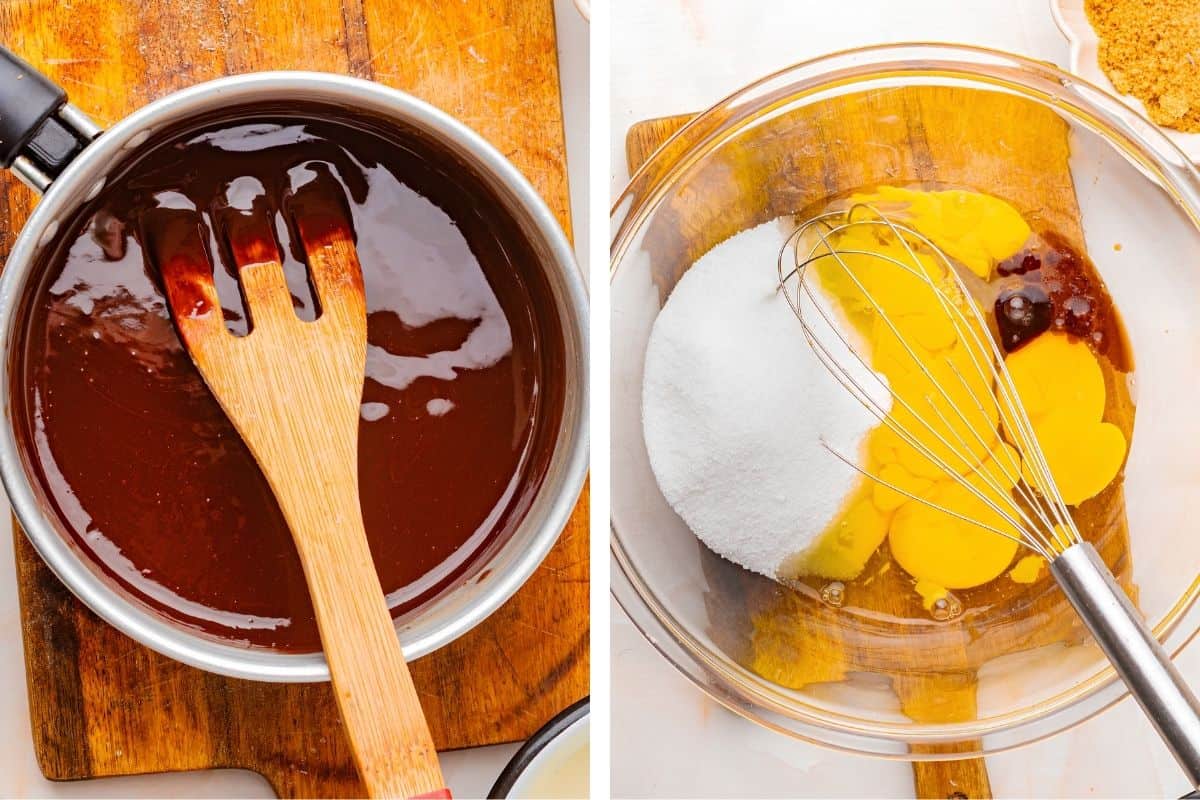
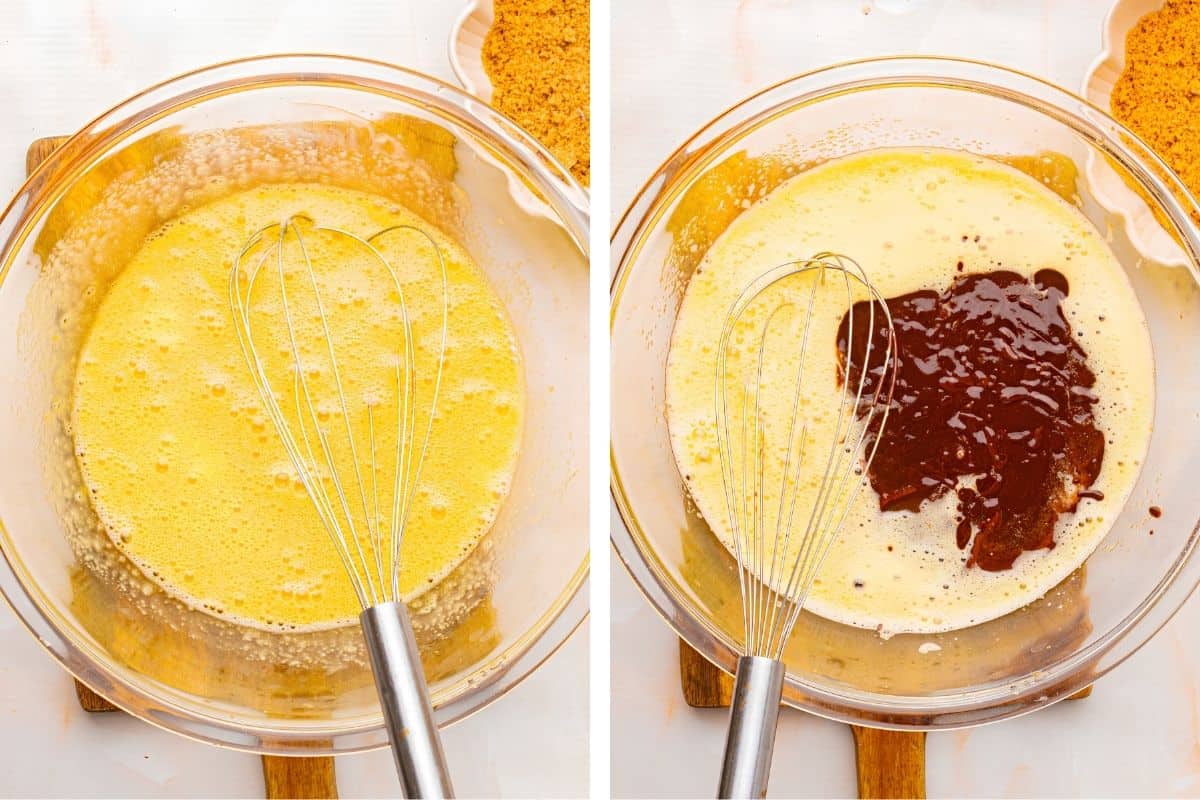
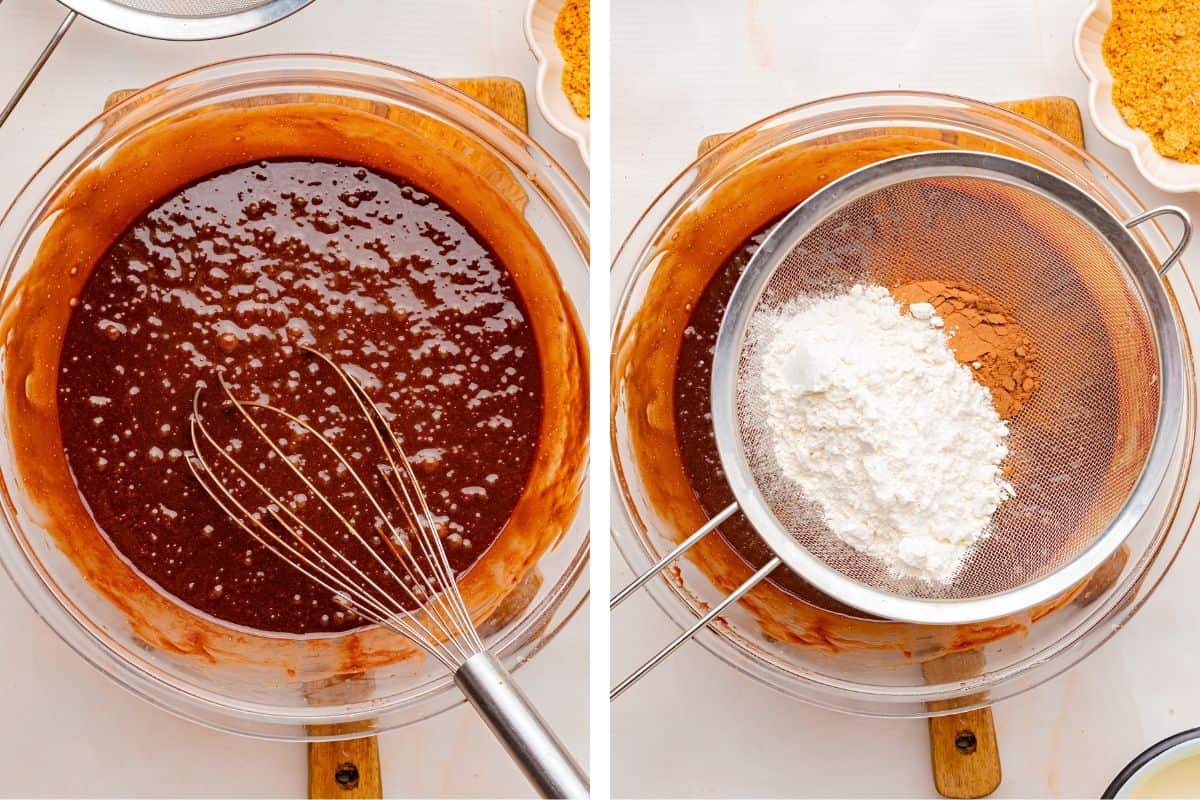
- Whisk the eggs, yolk, sugar, and vanilla for 1 to 2 minutes, just until smooth. You are not trying to make it airy.
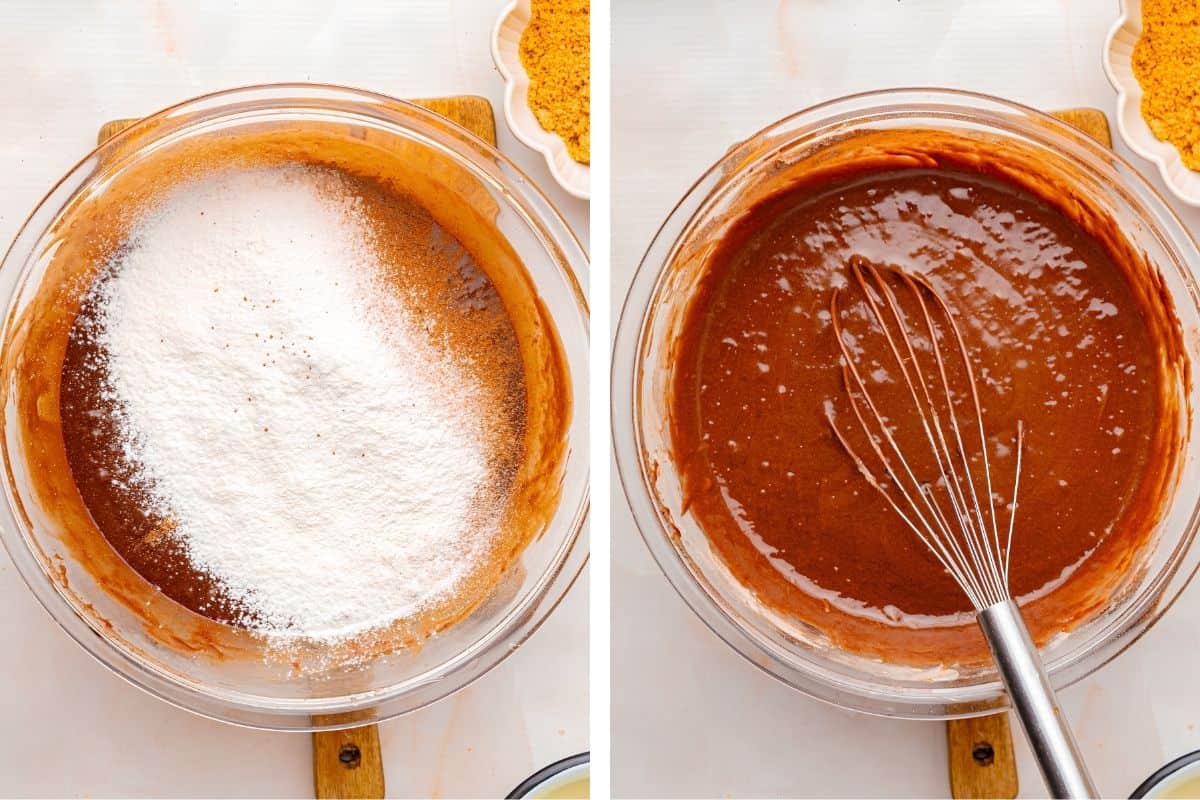
- Add the warm chocolate mixture to the eggs in a slow stream while whisking, then sift in the flour, cocoa, and salt and fold just until the dry streaks disappear.
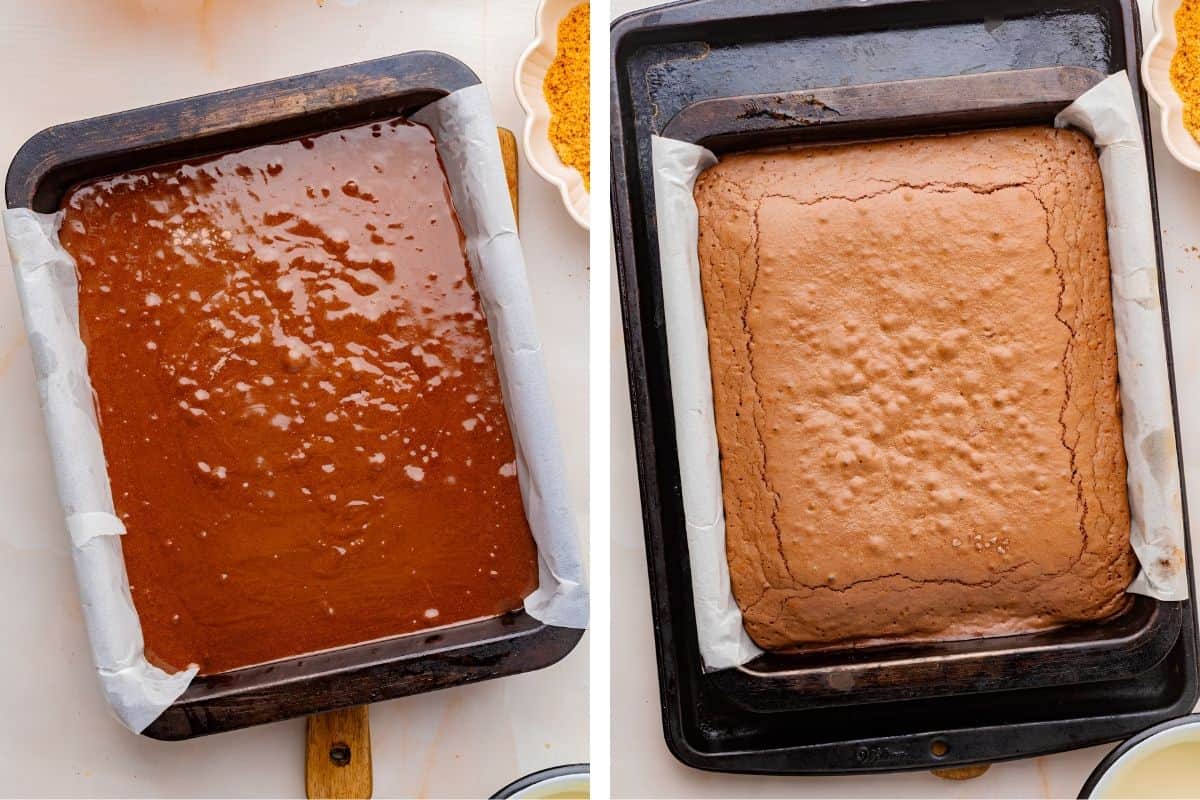
- Bake the brownie alone for 15 to 18 minutes. Pour the brownie better into the prepared pan and bake for 15 to 18 minutes. The edges should be set, and the top should have a thin skin, but the center will still be very soft. That is correct.
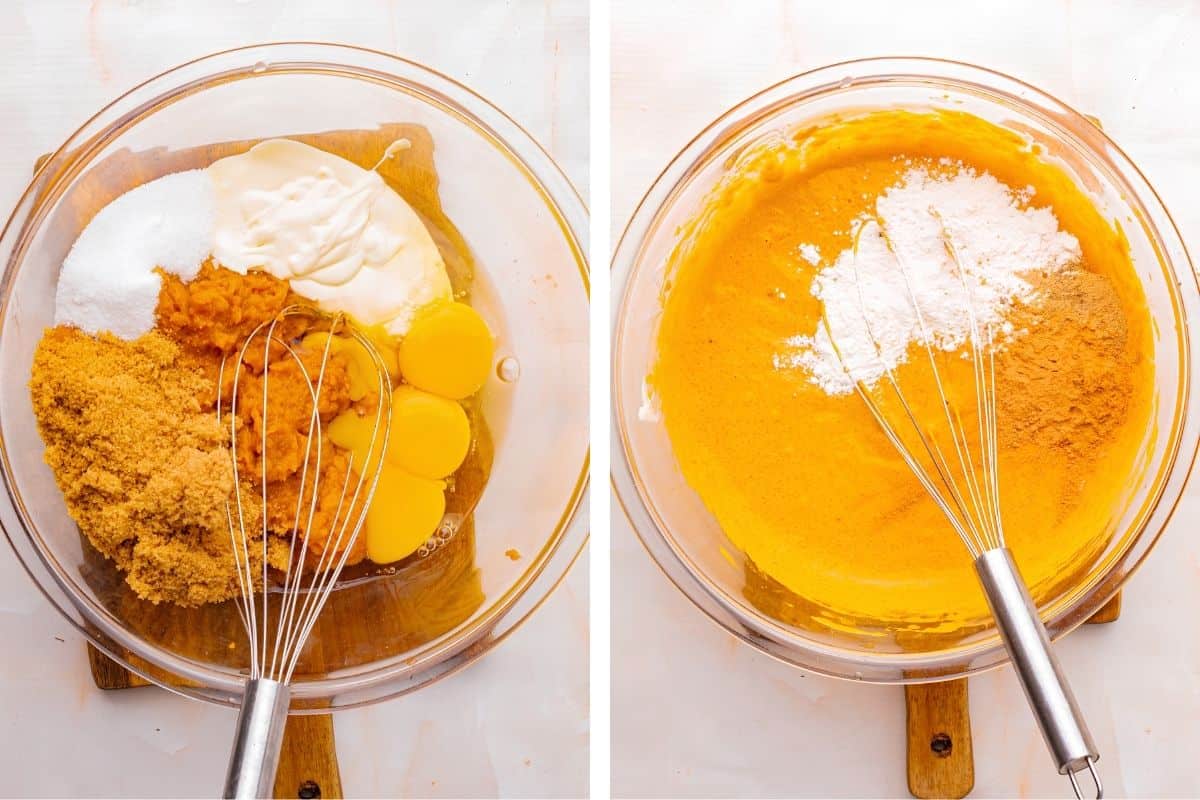
- Make the pumpkin filling while the brownie bakes. Whisk the pumpkin, eggs, yolk, cream, both sugars, and vanilla until smooth, then whisk in the flour, spices, and salt.
- Pour the pumpkin layer over the hot brownie as soon as it comes out of the oven and spread it gently. Do not press down, since the brownie underneath is still delicate.
- Drop the oven to 325°F (165°C) and bake 40 to 50 minutes more, until the edges are set and the center jiggles slightly as one piece.
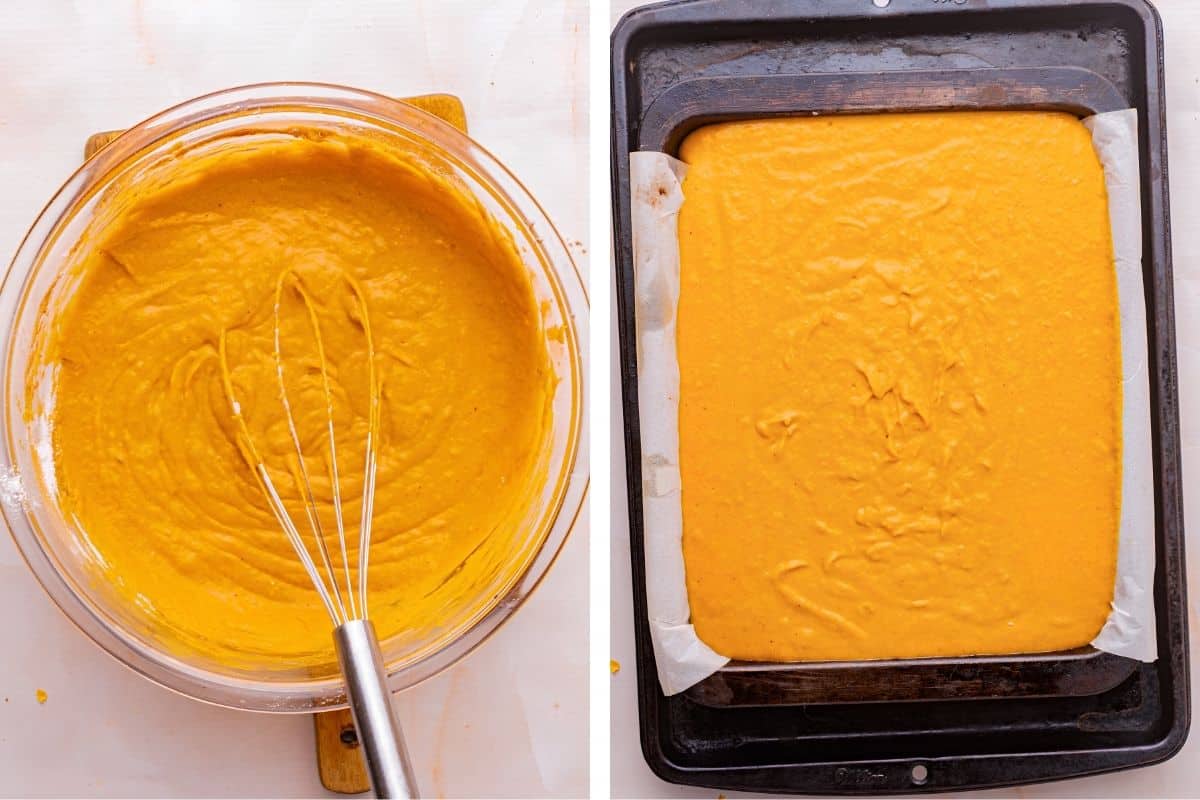
- Cool on a wire rack for about an hour, then refrigerate at least 4 hours before slicing.

Hi, Happy Fall! I’m home sick and bored and these sound amazing. But, only have canned coconut milk and dark chocolate chips. Can teas be substituted for the cream and milk chocolate? If so, I’m starting them this evening for Monday Night Football!