
This post may contain affiliate links. Read my disclosure policy.
There are many bread machine recipes out there, but if you're looking for just basic and simple homemade white bread - this is the perfect recipe for you!
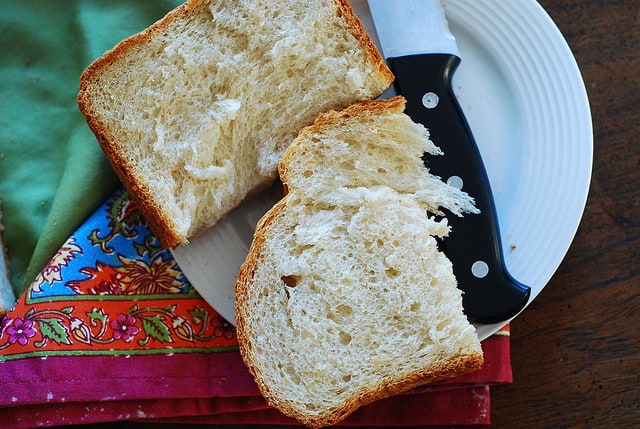
This is my reliable, "boring", proven recipe for a basic white bread. And, I also provide tips on how to make a homemade white bread less dense in a bread maker. In this recipe, all you do is spend 5 minutes to add ingredients to the bread pan and the bread machine does all the work, on an automatic cycle that is already programmed. That's the whole purpose of the bread maker, right? The end result is a tasty loaf of white bread just of the right density.
I do believe that the day will come when I will use a bread machine for something more sophisticated, but for once this week I am sharing the recipe that doesn't require too much thinking or meddling. Sometimes it's just nice to make certain foods almost on auto-pilot, especially for basic stuff, like white bread.
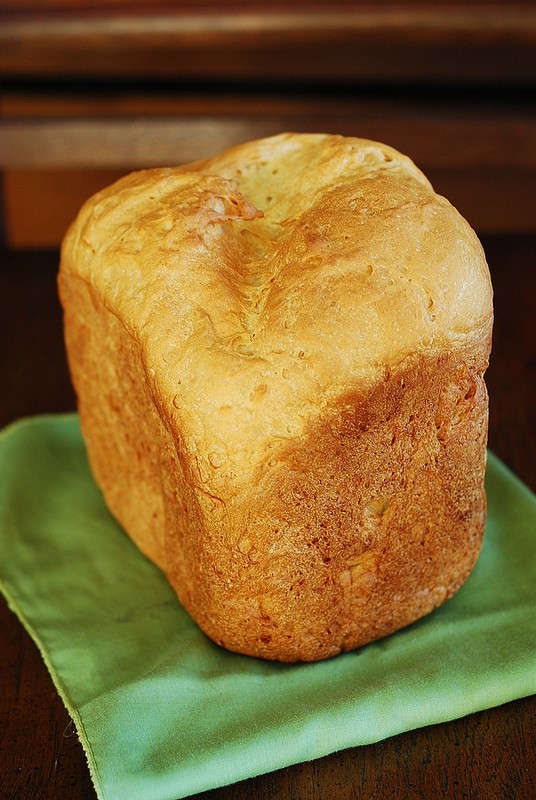
In the last 3 months I hardly bought any store-made bread, baking about a loaf every week at home, using bread machine recipes. And, I've noticed a couple of trends/issues when making bread: sometimes the bread comes out way too dense, or the loaf does not rise enough and, as a result, comes out even denser. So, here I will describe the homemade bread recipe that works for me to produce a less dense bread in a bread maker, using a basic cycle.
While making bread in a bread machine, make sure to consider these points:
- When you measure flour using cups, make sure not to pack flour too dense in a measuring cup, otherwise you will end up with much more flour than you need, and, therefore, the bread will come out denser. Measuring flour correctly will solve a lot of "dense" issues. The trick that works for me is that I use ⅓ measuring cup to carefully scoop all flour I need into the bread machine (usually about 3 cups), without over-packing it. Another way would be to weigh flour, which I don't do, but it's a solution.
- Use bread flour, not regular all-purpose flour for all bread machine recipes. Bread flour contains a higher percentage of gluten than regular all-purpose flour. Using bread flour will produce taller, less dense loaves. If you use all-purpose flour (which has smaller percentage of gluten than bread flour), your loaves will be flatter and denser.
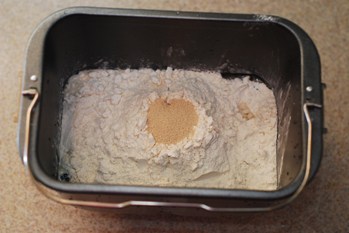
- When adding yeast, make sure you add it last, and add it on top of dry ingredients (flour). Make sure the yeast does not reach wet ingredients. Basically, make a small indentation on top of flour and add the yeast to the indentation, just like this:
And here is the simple white bread recipe. I started with the recipe that came in a little booklet together with my Williams-Sonoma bread machine, and I tweaked the ingredient measurements based on my preferences. It takes 10 minutes to prepare all ingredients together, and then it takes 3 hours and 15 minutes to bake the bread in a bread machine.
Bread Machine Recipe: How to make homemade white bread less dense
Ingredients
- 1 cup and 3 tablespoons water
- 2 tablespoons vegetable oil
- 1 ½ teaspoons salt
- 2 tablespoons sugar
- 3 ¼ cups white bread flour
- 2 teaspoons active dry yeast
Instructions
Important note about properly measuring flour using measuring cups:
- The proper way to measure flour using measuring cups is to aerate it first. This is done either by sifting flour, or aerating it by fluffing it up and whisking it well, then spooning it into the measuring cup, then carefully removing any excess flour with a knife. If you just stick that measuring cup in the bag of flour and scoop some out, you will get a lot more flour than what the recipe calls for. Do aerate the flour, or you will end up with dry dough!
How to make bread in a bread machine:
- Add water and oil into the bread pan. Add salt, sugar. Add flour.
- Make a small indentation on top of flour and make sure it does not reach wet ingredients. Add the yeast to the indentation.
- Keep yeast away from the salt.
- Insert the bread pan into the bread machine, press it down to snap. Close the lid.
- Use Basic bread, 1.5 lb loaf, medium crust cycle (3 hrs 15 minutes)
- When bread is done, remove the bread pan using oven mitts. Turn over the bread pan and shake it to release the loaf. Let the loaf cool on a wire rack for about 30 minutes.
Notes
- The recipe is adapted from Williams-Sonoma bread machine booklet.
- I have recently tweaked this recipe and made a delicious rustic Bread Machine Garlic & Herb Bread (with fresh rosemary and thyme) - worth checking out!
My Other Bread Recipes
Nutrition
Nutrition Disclaimer:
The nutritional information on this website is only an estimate and is provided for convenience and as a courtesy only. The accuracy of the nutritional information for any recipe on this site is not guaranteed. It should not be used as a substitute for a professional nutritionist's advice.

Favorite bread Recipe!
For some reason grocery stores don't carry the bread mix anymore. I could buy them on eBay but they are not cheap. Thanks for the recipe. I'll give it a try.
Kenneth, ideally, of course, using bread flour is your best choice. Here is the reasoning behind it:
- Use bread flour, not regular all-purpose flour for all bread machine recipes. Bread flour contains a higher percentage of gluten than regular all-purpose flour. Using bread flour will produce taller, less dense loaves. If you use all-purpose flour (which has a smaller percentage of gluten than bread flour), your loaves will be flatter and denser.
- However, I did have comments on this recipe when people used all-purpose flour, and the bread came out well albeit a bit denser. If using all-purpose flour, use only 3 cups of flour, don't put the last 1/4 cup of flour.
I've just bought a new Russell Hobbs breadmakers, followed their recipe and made a soggy house brick! Found your recipe online and Wow! A perfect loaf. Thanks so much.. Jo
Jo, I am so happy this recipe worked well in your bread machine! Thank you for this glowing review! 🙂
Here are some other variations that you can do using this recipe:
➡️ 1) Cinnamon raisin bread. You can add about 3/4 cup raisins (even pre-plumped ones) and 1 teaspoon cinnamon to the flour (dry mixture). And, proceed with the recipe as is.
➡️ 2) Cheese bread. If adding cheese, I would use about 1 cup of shredded cheese (use Parmesan or Asiago) and add it together with the DRY INGREDIENTS (bread flour). Add the bread machine yeast last. The yeast should not touch the liquid ingredients.
➡️ 3) Bread with herbs. Another variation is to add about 1 tablespoon of Rosemary and 1/2 teaspoon of Italian seasoning (or some other combination of dry herbs, such as thyme) to the flour mixture.
➡️ 4) Garlic bread. Add the crushed or minced garlic (about 2 or 3 tablespoons) together with the LIQUID INGREDIENTS, then add dry ingredients (just like the recipe states), then add the yeast last (making sure the yeast is not touching the liquid ingredients).
Heather, thank you for such a positive comment! 🙂
Just the right texture and flavor. Best bread machine recipe I've used so far. Thanks for sharing.
John, I am so flattered by your comment - thank you! 🙂
We love making this easy, fool-proof bread! However I only had a nice, domed top the first time I made this recipe. I don't know what keeps happening, but when we pull the bread out, the top is flat/deflated now. The texture is still nice, moist and airy, but the top portion has just deflated. Any idea what's going on? My yeast is newly purchased, doesn't expire until 2024.
I had the same problem the first two times I made it but the third time was perfect. Sharing in case it helps you. The first two times I aerated the bread flour first and added 3 1/4 cups of the aerated flour. Both times, the top was deflated. The third time, I measured the 3 1/4 cups from the bag, then aerated and added it to the bread maker. It was more than 4 cups that way and it turned out beautifully.
Delicious! Great texture, taste and tender flaky crust. I may never buy a bread loaf again. My only complaint is that I might have to make it daily for my family.
Heather, I am really happy the bread came out well! Thank you for taking the time to share such a positive comment! 🙂
I would like to have the flavori would like to have the flavor of the old timey bread. Tried your recipe and liked it but want the flavor of old timey bread
I had almost decided a breadmaker wasn't for me - until I tried your recipe. Your recipe changed my mind - the results were awesome!
Logan, homemade bread is truly the best and I am glad you gave your bread machine another chance! 🙂
I tried making your white basic bread and we love it....
Do you happen to have a half white and half whoe wheat recipe?
Joanne, I've had comments on this recipe that people used whole wheat flour and the bread turned out great, just somewhat denser. I think you can safely use half regular white bread flour and half whole wheat flour (making sure to sift or aerate both first) without making any other changes.
Just made a loaf. Came out perfect. Used bread maker for kneading only. Baked in 350 for 25 mins and came out perfect. In-laws lived it!
Julie, glad you loved the recipe! Great feedback about using the bread maker for kneading only and then baking the bread in the oven!
Could you provide weight measurements for the ingredients?
Lauren, there are 2 links under the ingredients list - US Customary - Metric. If you click on Metric, it will convert the ingredients into grams.
This is my go-to for basic white bread. Perfect.
Anne, glad you found this recipe helpful! 🙂
I've been looking for a good white bread recipe for a long time. I just baked a loaf of your bread in my Oster bread maker. All I can say is WOW! I've never had a bread come out as light and airy as yours did. I can't wait to bake more loaves to give as gifts to my friends and family.
Valerie, I am so comments like this! 🙂 Thank you for taking the time to share this wonderful feedback. Happy Holidays!
Making bread in a machine was not my idea of making bread. BUT, your tip on spooning the bread flour into measuring cup AFTER stirring the flour has totally changed my mind.
Whether it is the recipe or the tip, we love this. We make 2-3 loaves every week and one on the weekend!! Used for gifts as well. Thanks so much for putting this recipe out there.
Karla, thank YOU for such a thoughtful and wonderful comment - I really appreciate it! 🙂 Homemade bread tastes the best even if using the bread machine!
This is THE best bread recipe I have tried! And I make bread every week. I love the taste and texture of the bread from this recipe.
Thank you so much for sharing it.
I have even subbed about a third of a cup of my home ground sprouted wheat and about a cup of ap flour because I didn't have enough bread flour and it STILL turned out perfect.
I am going to put this recipe in a safe place. It's a keeper!
Toni, thank you so much for taking the time to share such a positive and enthusiastic comment! I really appreciate it. Comments like that mean a lot to any food blogger. Happy Holidays and best wishes to you and your family! 🙂
I've found that if I take the initial temperature of the water, and it hits 100F, then the bread has a decent rise.
Kim, that's a great observation and an excellent tip!
This is so far the absolute best recipe I’ve found for my bread maker! How long do you recommend letting it sit before cutting into slices and storing?
Brittney, thank you for this wonderful feedback! 🙂 I would let the loaf rest for 30 or 40 minutes in a loaf pan on a cooling rack. Then, carefully run a spatula between the sides of the pan and the loaf itself to loosen the loaf. Invert the pan to remove the baked bread (the pan might still be hot so you might have to use oven mitts). I like to eat the bread warm and it should be still warm at this point. What I usually do is use a serrated knife to cut just a few slices of the bread carefully - just a few slices that I know I will use immediately while the bread is still warm. And, then, I let the bread cool off completely (probably for another 30 minutes) before slicing it and/or storing it for later.
If you don't plan on eating the bread within the hour, I would let the bread cool off in a loaf pan completely for 1 hour before inverting the pan.
Enjoy! 🙂
Just made this to gift to a family with homemade chicken noodle soup, yum! Hope they love it! It smells AMAZING, thank you!
Rochelle, thank you for this wonderful and positive comment and 5-stars - I appreciate it! 🙂
why don't you just weigh the flour? then you'd know you're getting the right amount.
Yes, that's one possibility. But, I think some people (me!) don't usually use scale in everyday cooking.
Does anyone know if margarine would work in place of the oil? No oil in the house and I have a bit before I have money to buy extras like that
Yes, you can replace oil with margarine. Just be sure to melt the margarine before measuring and allow it to cool before adding to the other ingredients.
Inez, thank you for this feedback!
Thank you so much for this recipe! I finally have figured out the secret to making bread machine bread that is not dense, but light and airy, with the perfect density. I've also discovered what amazing breakfast toast this bread makes.
John, I am so glad you found this recipe useful and practical! Thank you for taking the time to share such a positive comment! 🙂
Hello fantastic recipe, my bread is absolutely perfect
Thanks so much
Patricia - I love your comment - thank you! 🙂